Local Businesses Blog in Texas

Cleveland Texas

Category: Garage Door Page 3 of 21

How To Soundproof A Garage Door – Kokomo Overhead & Garage Doors

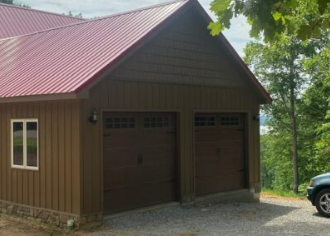
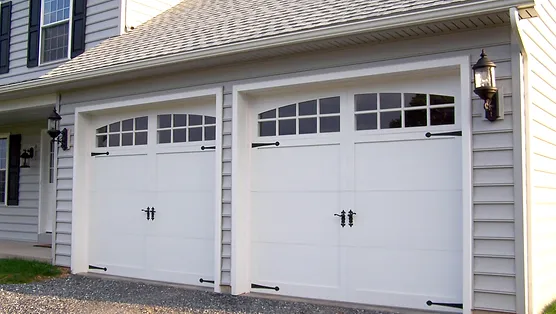
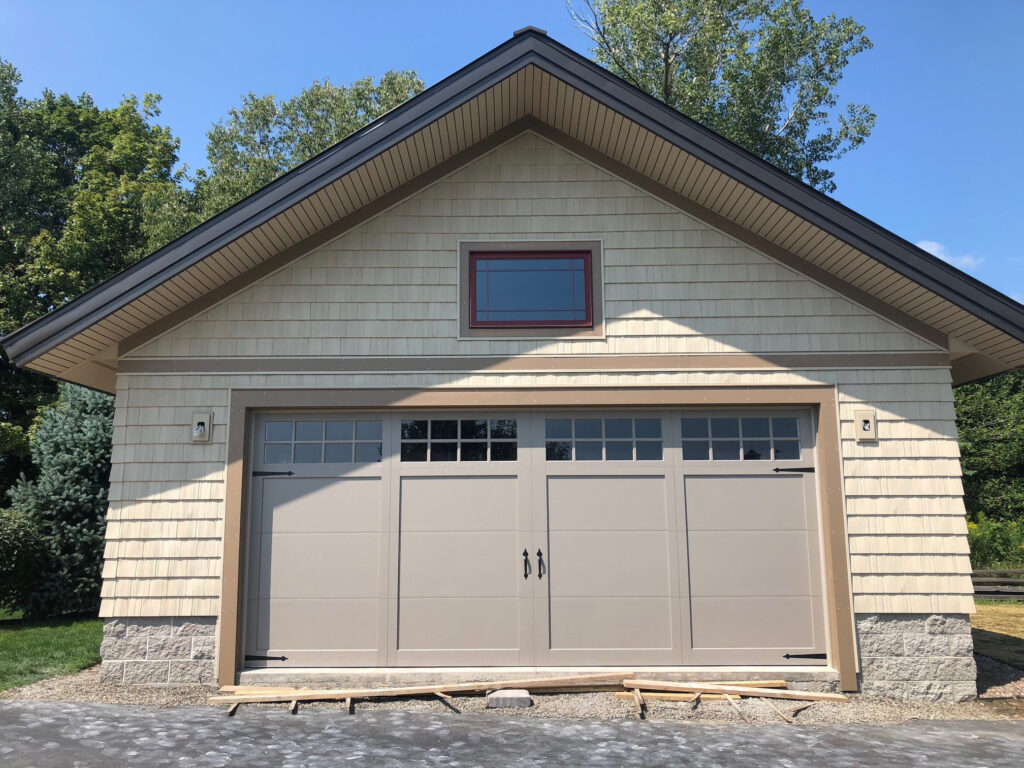
Kokomo Overhead & Garage Doors are often a major source of noise infiltration in both residential and commercial settings. Soundproofing your garage door can greatly improve the comfort and tranquility of your living space, whether you’re converting your garage into a workshop, home gym, or simply looking to reduce external noise.

In this guide, we’ll explore effective methods and techniques to soundproof your garage door and create a more peaceful environment.

  1. Identify Sound Leakage Points

Before you begin soundproofing your garage door, it’s crucial to identify potential areas where sound is entering or escaping. Inspect the garage door for gaps, cracks, and poorly fitted sections that may allow noise to seep through.

  1. Weatherstripping and Sealing

One of the simplest and most effective ways to reduce sound transmission is by using weatherstripping and sealing materials to close gaps around the garage door. Apply adhesive-backed weatherstripping to the edges of the door and along the frame to create a tight seal. Silicone caulk can be used to seal gaps and cracks around the door perimeter and frame.

  1. Install Acoustic Panels

Acoustic panels are designed to absorb sound waves and reduce echo. Mounting acoustic panels on the interior surface of your garage door can significantly dampen noise. These panels are available in various sizes, designs, and materials, allowing you to choose options that fit your aesthetic preferences.

  1. Add Mass with Soundproofing Blankets

Soundproofing blankets, also known as moving blankets, can be hung on the garage door to add mass and absorb sound. These blankets are specifically designed to reduce noise and are made from dense materials that help block sound transmission. Install the blankets by hanging them from hooks or curtain rods.

  1. Install Soundproof Curtains

Soundproof curtains are thick and heavy curtains that are specially designed to absorb sound and reduce noise transmission. Install these curtains on the interior of your garage door using curtain rods. They not only provide soundproofing benefits but can also enhance the overall appearance of the space.

  1. Use Mass-Loaded Vinyl (MLV)

Mass-loaded vinyl is a dense material that can be attached to the garage door to block sound waves. It’s an effective soundproofing solution due to its high mass and flexibility. Attach MLV to the interior of the garage door using adhesive or fasteners. Ensure that the seams are properly sealed to prevent sound leakage.

  1. Install Insulation Panels

Insulation panels made from materials like foam or fiberglass can be installed on the interior of the garage door to reduce sound transmission. These panels not only provide soundproofing but also contribute to temperature control. Attach the insulation panels securely to the door’s surface.

  1. Seal with Acoustic Caulk

Acoustic caulk is designed to seal gaps and cracks in a way that minimizes sound leakage. Apply acoustic caulk around the edges of the garage door, between panels, and along seams to create an airtight and soundproof seal.

  1. Upgrade to Soundproof Garage Door Panels

If you’re looking for a more comprehensive solution, consider upgrading to soundproof garage door panels. These panels are designed with noise reduction in mind and are specifically engineered to absorb and block sound waves. Consult with garage door manufacturers or soundproofing professionals for options that suit your needs.

  1. Double-Layer Approach

For an extra layer of soundproofing, consider adding a second layer of material to the garage door. This could involve installing a secondary layer of plywood, drywall, or mass-loaded vinyl on the interior side of the door. This approach increases mass and helps to trap and absorb sound waves.

  1. Regular Maintenance

To maintain the effectiveness of your soundproofing efforts, regularly inspect the weatherstripping, seals, and materials you’ve applied. Replace any damaged or deteriorated components promptly to ensure consistent soundproofing.

  1. Professional Consultation

For complex or challenging soundproofing projects, consider consulting with a professional soundproofing specialist. They can provide personalized recommendations and ensure that the soundproofing measures are applied correctly.

Conclusion

Soundproofing your Kokomo Overhead & Garage Doors is a valuable investment that can greatly enhance the comfort and tranquility of your living space. By identifying and addressing sound leakage points, using a combination of materials such as weatherstripping, acoustic panels, soundproofing blankets, and mass-loaded vinyl, you can effectively reduce noise transmission. Experiment with different solutions to find the combination that works best for your specific needs. With a well-executed soundproofing plan, you can create a quieter and more peaceful environment within your garage and living area.

Kokomo Overhead & Garage Doors

1910 Valerie Ct, Kokomo, IN 46902, United States

1-765-945-2524

Does Home Warranty Cover Garage Door – Haslet Gates & Garage Doors

A home warranty is a service contract that covers the repair or replacement of major home systems and appliances due to normal wear and tear. Whether a home warranty covers a Haslet Gates & Garage Doors depends on the specific terms and coverage options of the warranty policy you have or are considering.

Let’s explore the details of how home warranties may or may not cover garage doors:

1. Basic Coverage:

  • Home warranties typically offer basic coverage for major systems and appliances, such as HVAC systems, plumbing, electrical, water heaters, and kitchen appliances. Basic coverage may not automatically include the garage door.

2. Optional Add-Ons:

  • Some home warranty providers offer optional coverage add-ons for items not covered in their basic plans. Garage doors may fall under this category, allowing homeowners to customize their coverage to include the garage door.

3. Specific Policies Vary:

  • Home warranty companies vary in their coverage offerings and policies. Some may offer coverage for garage doors, while others may not. It’s important to carefully review the terms and conditions of the warranty policy to determine if a garage door is covered.

4. Garage Door Components Covered:

  • If a home warranty does cover garage doors, it may cover certain components of the garage door system, such as the garage door opener, springs, rollers, and tracks. Coverage could also extend to the electrical and mechanical parts of the opener.

5. Exclusions and Limitations:

  • Even if a home warranty covers garage doors, there may be limitations, exclusions, and conditions that apply. For example, coverage might exclude pre-existing issues, improper maintenance, or cosmetic damage.

6. Pre-Existing Conditions:

  • Many home warranties have a waiting period before coverage becomes effective. This means that if your garage door has a pre-existing issue or breaks down shortly after purchasing the warranty, it may not be covered.

7. Service Call Fees:

  • Home warranty plans often involve service call fees or deductibles for each service visit. Make sure to understand the costs associated with service calls related to the garage door.

8. Regular Maintenance:

  • Home warranty companies may require proof of regular maintenance for certain items to be eligible for coverage. This could apply to garage doors and their components as well.

9. Reading the Contract:

  • Before purchasing a home warranty, carefully read the contract, terms, and conditions to understand what’s covered, what’s not covered, and any limitations. If garage doors are not explicitly mentioned, contact the warranty provider to inquire about coverage options.

10. Professional Inspection:

  • If your home already has a garage door, consider having it professionally inspected before purchasing a home warranty. This way, you can address any existing issues before coverage starts.

11. Manufacturer’s Warranty:

  • Keep in mind that many garage door openers come with their own manufacturer’s warranty. If your garage door opener is still under warranty, you might not need additional coverage.

Conclusion:

While some home warranty providers offer coverage for Haslet Gates & Garage Doors, it’s important to do your research and carefully read the terms and conditions of the warranty policy. If you’re specifically interested in garage door coverage, inquire with the warranty provider to confirm whether it’s included in the plan or available as an optional add-on. Always weigh the cost of the warranty against the potential benefits and assess your specific needs before making a decision.

Haslet Gates & Garage Doors

817-242-5042

How To Disassemble Garage Door Opener Rail – Bedford Gates & Garage Doors

Disassembling a Bedford Gates & Garage Doors opener rail can be necessary for maintenance, repair, or replacement purposes. The rail is the track that guides the garage door as it opens and closes. It’s important to follow proper procedures and safety precautions when disassembling the rail to avoid injury and ensure a successful reassembly.

Here’s a step-by-step guide on how to disassemble a garage door opener rail:

Materials You’ll Need:

  • Adjustable wrench or socket wrench set
  • Screwdriver
  • Lubricant (optional)
  • Safety goggles and gloves

Step-by-Step Guide:

1. Safety First:

  • Before you begin, make sure to disconnect the power to the garage door opener to prevent any accidental activation while working.

2. Gather Necessary Tools:

  • Collect the required tools, including a wrench, screwdriver, and any other tools that may be needed based on your specific garage door opener model.

3. Open the Garage Door:

  • Open the garage door fully to ensure that the rail is accessible and not under tension.

4. Locate the Rail Connections:

  • Identify the points where the rail is connected to the garage door opener unit and to the garage door itself. These are typically secured with bolts or screws.

5. Disconnect from the Opener Unit:

  • Locate the point where the rail is attached to the garage door opener unit. Use the wrench to loosen and remove the bolts or screws securing the rail to the unit.

6. Disconnect from the Garage Door:

  • Next, locate the point where the rail is attached to the garage door. These connections might be near the top of the door or on the door panel itself. Use the wrench to loosen and remove the bolts or screws securing the rail to the garage door.

7. Remove the Rail Sections:

  • Depending on the length of the rail, it might be made up of multiple sections. Carefully remove each section by sliding it out of the connector on the adjacent section.

8. Store the Rail Sections:

  • As you remove the rail sections, set them aside in a safe and organized manner to prevent any damage. You may want to label or mark the sections for easy reassembly.

9. Lubricate (if necessary):

  • While disassembling the rail, you can take the opportunity to lubricate the rail and other moving parts. This can help improve the overall performance and reduce friction.

10. Inspect for Damage:

  • While disassembling, inspect the rail, connectors, and other components for any signs of wear, damage, or rust. Replace any damaged parts as needed.

11. Keep Hardware Organized:

  • As you remove bolts, nuts, and screws, place them in a container or bag to keep them organized. This will make reassembly easier.

12. Safety Precautions:

  • Wear safety goggles and gloves throughout the process to protect yourself from potential hazards.

13. Reassembly:

  • To reassemble the rail, follow the steps in reverse order. Make sure to securely tighten all bolts and screws.

14. Test the Door:

  • After reassembling the rail, test the garage door to ensure that it opens and closes smoothly. Check for any unusual noises or issues.

15. Seek Professional Help (if needed):

  • If you encounter difficulties during disassembly or are unsure about reassembly, consider seeking help from a professional garage door technician.

Conclusion:

Disassembling a Bedford Gates & Garage Doors opener rail requires careful execution and attention to safety. By following the steps outlined above and taking proper safety precautions, you can successfully disassemble the rail for maintenance, repair, or replacement purposes. Always prioritize safety and accurate reassembly to ensure the proper functioning of your garage door opener system.

Bedford Gates & Garage Doors

2201 Harwood Rd, Bedford, TX 76021, United States

1-817-886-3064

How To Build A Dumbwaiter With A Garage Door Opener – Springtown Gates & Garage Doors

Building a dumbwaiter with a Springtown Gates & Garage Doors opener can be a convenient and practical addition to your home, especially if you have multiple levels and need to transport items between them. A dumbwaiter is a small elevator designed to carry objects rather than people.

Here’s a step-by-step guide on how to build a dumbwaiter with a garage door opener:

Important Considerations:

  • Permits and Regulations: Before starting, check local building codes and regulations to ensure that you comply with any requirements for installing a dumbwaiter.
  • Safety: Safety is paramount when building a dumbwaiter. Ensure that the dumbwaiter is structurally sound, and all components are securely fastened.
  • Materials: You’ll need various materials, including wood, metal components, pulleys, cables, and a garage door opener.

Step-by-Step Guide:

1. Plan and Design:
Determine the purpose of your dumbwaiter, the locations it will serve, and the maximum weight capacity you’ll need. Plan where you want to install it and how it will fit within your space.

2. Choose a Garage Door Opener:
Select a suitable garage door opener that can handle the weight and size of the dumbwaiter. Look for an opener with a remote control feature for easy operation.

3. Frame the Shaft:
Create a shaft that will house the dumbwaiter. The shaft should be well-anchored and sturdy enough to support the dumbwaiter’s weight. Frame the shaft using wood or metal, and ensure it’s properly secured to the floor and ceiling.

4. Install Rails and Pulleys:
Install rails along the inside of the shaft to guide the dumbwaiter’s movement. Attach pulleys to the top and bottom of the shaft to guide the cables. The dumbwaiter will travel along these rails and be guided by the pulleys.

5. Construct the Dumbwaiter Car:
Build the car that will carry items between floors. The car can be constructed from wood or metal, and it should be sized to fit within the shaft. Attach the car to the cables that run through the pulleys.

6. Install the Cables and Counterweights:
Attach one end of the cables to the dumbwaiter car and the other end to a counterweight on the opposite side of the pulleys. The counterweight helps balance the weight of the dumbwaiter and makes it easier to operate.

7. Attach the Garage Door Opener:
Mount the garage door opener in a location where it can easily control the movement of the dumbwaiter. Follow the manufacturer’s instructions for installation and programming.

8. Wiring and Electrical Connections:
Connect the garage door opener to a power source and ensure that the wiring is properly concealed and protected.

9. Test the Operation:
Before using the dumbwaiter, thoroughly test its operation to ensure that it moves smoothly, stops at the desired locations, and can handle the weight you intend to carry.

10. Safety Features:
Consider adding safety features such as limit switches that prevent the dumbwaiter from moving beyond its intended range, and an emergency stop button for immediate halting.

11. Finish the Shaft:
Finish the interior of the shaft to create a clean and visually appealing space. You can use materials such as drywall, paint, or paneling to enclose the shaft.

12. Regular Maintenance:
Regularly inspect and maintain the dumbwaiter to ensure that it’s operating smoothly and safely. Lubricate moving parts as needed and address any issues promptly.

Additional Tips:

  • Professional Assistance: Building a dumbwaiter with a garage door opener can be complex, especially when considering weight capacity, safety features, and proper installation. If you’re not experienced with construction and mechanics, consider consulting a professional for assistance.
  • Safety Precautions: Ensure that the dumbwaiter is structurally sound, and all safety measures are in place. The use of limit switches, emergency stops, and proper weight distribution is crucial.
  • Customization: You can customize your dumbwaiter by adding features such as doors, shelves, or even insulation to protect sensitive items.
  • Remote Control: A remote control garage door opener makes operating the dumbwaiter more convenient and user-friendly.

Conclusion:

Building a dumbwaiter with a Springtown Gates & Garage Doors opener requires careful planning, construction skills, and attention to safety. While this guide provides a basic overview, the complexity of the project may require professional expertise, especially when it comes to weight calculations, structural integrity, and safety features. A well-built dumbwaiter can enhance the functionality and convenience of your home, making it easier to transport items between floors efficiently and safely.

Springtown Gates & Garage Doors

104 Adalida Ln, Springtown, TX 76082, United States

1-817-631-1036

How Often Should Garage Doors Be Serviced – Shelbyville Gates & Garage Doors

Regular Shelbyville Gates & Garage Doors maintenance is essential for ensuring the smooth and safe operation of your garage door, as well as extending its lifespan. While there’s no one-size-fits-all answer to how often garage doors should be serviced, several factors influence the recommended frequency of maintenance. By understanding these factors and following some general guidelines, you can determine the appropriate service schedule for your garage door.

Here’s a comprehensive guide to help you understand how often garage doors should be serviced:

Factors Affecting Service Frequency:

  1. Usage Frequency: The more frequently you use your garage door, the more wear and tear it experiences. If you use your garage door multiple times a day, it may require more frequent servicing compared to one that’s used less frequently.
  2. Environmental Conditions: Factors such as extreme temperatures, humidity, and exposure to harsh weather conditions can impact the garage door’s components. If you live in an area with severe weather, more frequent maintenance might be necessary.
  3. Door Material and Type: The material and type of garage door can influence maintenance needs. For example, wooden doors might require more attention due to potential warping, while insulated doors could require checks on the insulation’s integrity.
  4. Age of the Door: Older garage doors may require more frequent servicing as their components age and wear out.
  5. Quality of Components: High-quality components tend to be more durable and may require less frequent maintenance. Lower-quality components might require more frequent attention.
  6. DIY vs. Professional Installation: If the door was professionally installed, it might require less maintenance compared to a door that was improperly installed or installed as a DIY project.

General Guidelines for Garage Door Servicing:

  1. Annual Servicing: As a general rule of thumb, it’s recommended to have your garage door serviced by a professional technician at least once a year. This annual service can address basic maintenance tasks and catch any potential issues before they become major problems.
  2. Seasonal Checks: Consider performing seasonal checks on your garage door yourself. Inspect components such as springs, cables, rollers, tracks, and hinges for signs of wear, damage, or misalignment. Lubricate moving parts as needed.
  3. Signs of Trouble: If you notice any unusual sounds, jerky movements, balance issues, or other signs of trouble, it’s important to have your garage door inspected by a professional technician promptly.

Professional vs. DIY Maintenance:

  1. Professional Inspection: While you can perform some basic maintenance tasks yourself, having a professional technician inspect your garage door annually is crucial. They have the expertise to identify potential problems and perform more advanced maintenance.
  2. DIY Maintenance: You can perform some routine maintenance tasks on your own, such as lubricating moving parts, tightening loose bolts, and visually inspecting the door. However, more complex tasks should be left to professionals.

Benefits of Regular Servicing:

  1. Safety: Regular servicing ensures that your garage door is operating safely, reducing the risk of accidents or injuries.
  2. Preventive Maintenance: Regular maintenance can help catch issues early, preventing costly repairs down the line.
  3. Extended Lifespan: Well-maintained garage doors tend to have longer lifespans, saving you money in the long run.
  4. Smooth Operation: Properly maintained doors operate smoothly and quietly, enhancing convenience.

Conclusion:

The recommended frequency of Shelbyville Gates & Garage Doors servicing depends on factors such as usage frequency, environmental conditions, door material, and more. While an annual professional inspection is recommended, performing seasonal checks and addressing issues promptly are also important. Regular maintenance helps ensure the safety, longevity, and reliable operation of your garage door. If you’re unsure about the appropriate service schedule for your specific garage door, consulting a professional garage door technician can provide guidance tailored to your needs.

Shelbyville Gates & Garage Doors

1567 Greenland Park Cir, Shelbyville, KY 40065

502-513-6328

How Do You Change Your Garage Door Code – Anderson Gates & Garage Doors

Changing your Garage Door Repair Anderson IN code is an important step to ensure the security of your home and garage. Most modern garage door openers come with the ability to change the access code, which is a unique sequence of numbers used to operate the garage door. By regularly updating your code, you can prevent unauthorized access and enhance the safety of your property.

Here’s a comprehensive guide on how to change your garage door code:

Step 1: Preparation and Safety

  1. Disconnect Power: Before starting, disconnect power to the garage door opener to prevent accidental activation during the code-changing process.
  2. Safety Gear: Wear safety glasses and gloves to protect yourself during the process.

Step 2: Locate the Learn Button

  1. Find the Opener Motor Unit: Locate the main control unit of your garage door opener. This unit is usually attached to the ceiling of the garage near the door opening.
  2. Locate the Learn Button: On most garage door openers, you’ll find a “Learn” or “Program” button on the motor unit. This button is often colored and may have a small LED light next to it.

Step 3: Clear the Current Code

  1. Press and Hold the Learn Button: Press and hold the “Learn” button on the motor unit until the indicator light on the unit turns off. This action clears the memory of the opener.

Step 4: Set the New Code

  1. Enter the New Code on the Keypad: a. Press the Learn Button: Press the “Learn” button once to prepare the opener to accept a new code. The indicator light will start blinking. b. Enter the New Code: Enter the new access code on the keypad, making sure to follow the manufacturer’s guidelines for the number of digits and any specific instructions. c. Press the Learn Button Again: Press the “Learn” button again to confirm the new code. The indicator light should turn solid or stop blinking, indicating that the new code has been accepted.

Step 5: Test the New Code

  1. Test the Keypad: Test the new code by entering it on the keypad. The garage door should open or close, depending on the function you selected.

Step 6: Reconnect Power

  1. Reconnect Power: Once you’ve successfully changed the code and tested it, reconnect power to the garage door opener.

Additional Tips:

  • Consult the Manual: Always refer to your garage door opener’s manual for specific instructions on changing the access code. Different models may have slightly different procedures.
  • Create a Memorable Code: Choose an access code that is easy to remember but not easily guessable. Avoid using simple sequences like “1234” or your address.
  • Regularly Update the Code: Make changing your garage door code a regular practice, such as every six months or whenever you feel the need for enhanced security.
  • Safety: Ensure that anyone who needs access to your garage has the updated code, and avoid sharing the code with unauthorized individuals.
  • Maintenance: Regularly clean and maintain your keypad to ensure that the buttons work correctly and the code is entered accurately.

Conclusion:

Changing your Garage Door Repair Anderson IN code is a simple yet essential step to enhance the security of your home. By following the steps outlined above and referring to your garage door opener’s manual, you can successfully change the access code on your keypad. Regularly updating the code and taking necessary security precautions will help ensure that only authorized individuals can access your garage, contributing to the safety and protection of your property.

Anderson Gates & Garage Doors

2007 McKinley St, Anderson, IN 46016, United States

1-463-217-0904

How Long Should Garage Door Spring Last – Murphy Gates & Garage Doors

The lifespan of Garage Door Repair Murphy TX springs can vary depending on several factors, including the quality of the springs, how often the door is used, climate conditions, and proper maintenance. Garage door springs are crucial components that counterbalance the weight of the door and assist in its smooth operation. Understanding the factors that influence the lifespan of garage door springs can help you anticipate when they might need replacement and ensure the safety and functionality of your garage door system.

Here’s a comprehensive guide on how long garage door springs should last and what factors to consider:

Types of Garage Door Springs:

  1. Torsion Springs: Torsion springs are installed horizontally above the garage door opening. They wind and unwind to lift and lower the door. Torsion springs generally have a longer lifespan compared to extension springs.
  2. Extension Springs: Extension springs are located on both sides of the door and stretch as the door opens. They have a limited number of cycles and tend to wear out more quickly.

Factors Influencing Garage Door Spring Lifespan:

  1. Quality of Springs: The quality of the springs themselves plays a significant role in their lifespan. Higher-quality springs made from durable materials tend to last longer.
  2. Usage Frequency: The more frequently the garage door is opened and closed, the more wear and tear the springs will experience. High usage can lead to faster deterioration.
  3. Door Weight: Heavier doors place more strain on the springs, potentially shortening their lifespan. Properly sized and adjusted springs are essential for maintaining longevity.
  4. Climate Conditions: Extreme temperatures, humidity, and exposure to harsh weather conditions can affect the springs’ performance and durability.
  5. Maintenance: Regular maintenance, such as lubricating moving parts and inspecting for wear, can extend the lifespan of garage door springs.

Average Lifespan of Garage Door Springs:

  1. Torsion Springs: On average, well-maintained torsion springs can last anywhere from 5 to 10 years or more. High-quality springs may last even longer. However, it’s recommended to have them inspected by a professional after around 5 years.
  2. Extension Springs: Extension springs typically have a lifespan of around 7 to 9 years, but this can vary based on usage and maintenance.

Signs of Worn-Out Springs:

  1. Sagging or Unbalanced Door: If the garage door appears uneven or sags to one side when in the closed position, it could indicate worn-out or imbalanced springs.
  2. Excessive Noise: Springs that are reaching the end of their lifespan may start making creaking, popping, or other unusual noises.
  3. Difficulty Opening or Closing: If you notice the garage door becomes increasingly difficult to open or close, it might be due to worn-out springs.
  4. Visible Wear: Look for signs of wear or rust on the springs. If you notice gaps or breaks in the springs, it’s time for replacement.

When to Replace Garage Door Springs:

  1. Professional Inspection: It’s a good idea to have a professional garage door technician inspect your springs regularly, especially if you’ve had them for several years.
  2. Noticeable Wear: If you notice any signs of wear or decreased performance, it’s advisable to have the springs replaced promptly.

Consult a Professional:

If you’re unsure about the condition of your garage door springs or if they need replacement, it’s best to consult a professional garage door technician. Attempting to replace springs on your own can be dangerous and should only be done by trained professionals.

In conclusion, the lifespan of Garage Door Repair Murphy TX springs can vary, but on average, they may last around 5 to 10 years. Proper maintenance, usage habits, and quality of springs play significant roles in determining their longevity. Regular inspections and professional assistance can help ensure your garage door springs are in good condition and operating safely.

Murphy Gates & Garage Doors

223 FM 544 #16, Murphy, TX 75094

469-425-7816

How To Relock A Garage Door – Grapevine Gates & Garage Doors

Relocking a Garage Door Repair Grapevine TX manually after it has been opened manually or due to a power outage is an important step to ensure the security of your property. While most modern garage doors automatically lock when fully closed, you may need to manually re-engage the locking mechanism if the door has been operated manually.

Here’s a comprehensive guide on how to relock a garage door:

Step 1: Safety Precautions

  1. Ensure Safety: Before attempting to relock the garage door, make sure there are no obstructions in the door’s path and that it is fully closed.

Step 2: Identify the Locking Mechanism

  1. Understand Your Garage Door Lock: Different garage doors have varying locking mechanisms. Some doors have automatic locking systems that engage when the door is fully closed, while others have manual lock bars or mechanisms that need to be engaged manually.

Step 3: Manual Lock Bars

  1. Locate the Lock Bars: If your garage door has manual lock bars, they are usually located on the inside of the door near the bottom. These bars slide into holes in the tracks to secure the door.
  2. Slide Lock Bars into Place: To relock the garage door, insert the lock bars into the corresponding holes in the tracks. This prevents the door from being lifted manually.

Step 4: Automatic Locking Mechanism

  1. Check for Automatic Locking: Some garage doors have an automatic locking mechanism that engages when the door is fully closed. This is typically activated by the door’s track engaging with a locking mechanism located on the inside of the door.
  2. Test the Locking Mechanism: Close the door fully and try to lift it manually. If the door resists lifting and feels securely locked, the automatic locking mechanism is likely engaged.

Step 5: Test the Locking

  1. Attempt to Lift the Door: After manually engaging the lock bars or ensuring that the automatic locking mechanism is engaged, attempt to lift the door manually from the outside. The door should not lift, indicating that it is securely locked.

Step 6: Unlocking the Door

  1. Unlock Before Operating: Before attempting to operate the garage door using the opener, make sure to unlock it. If your garage door has an automatic opener, it will not be able to lift the door if the manual lock bars are engaged.

Step 7: Regular Maintenance

  1. Maintain the Locking Mechanism: Periodically check the locking mechanism and lock bars for any signs of wear or damage. Lubricate the lock bars and their holes to ensure smooth operation.
  2. Lubricate Moving Parts: Regularly lubricate the moving parts of your garage door, including hinges, rollers, and tracks, to prevent rust and ensure proper operation.

Step 8: Considerations

  1. Security Measures: While manual lock bars provide an additional layer of security, remember that automatic garage door openers also have their own safety and security features. Ensure that your garage door opener’s security settings are activated and that your remote control codes are secure.
  2. Power Outages: In the event of a power outage, the automatic locking mechanism may not engage. Make sure to manually engage the lock bars during power outages to secure your garage door.

In conclusion, relocking a Garage Door Repair Grapevine TX involves engaging the manual lock bars or confirming that the automatic locking mechanism is engaged. By following these steps and performing regular maintenance, you can ensure that your garage door is securely locked and provides the necessary security for your property. Always prioritize safety and proper maintenance to keep your garage door functioning smoothly and securely.

Grapevine Gates & Garage Doors

601 W Wall St, Grapevine, TX 76051, United States

1-817-631-6355

How To Level A Crooked Garage Door – Colleyville Gates & Garage Doors

A crooked or unlevel Garage Door Repair Colleyville TX not only affects its appearance but also its functionality and security. A misaligned door can cause uneven wear on components and potentially lead to operational issues. Leveling a crooked garage door requires careful adjustments to various components to ensure proper alignment.

Here’s a comprehensive guide on how to level a crooked garage door:

Step 1: Safety First

  1. Disconnect the Opener: Before attempting any adjustments, disconnect the garage door opener from the power source to prevent accidental activation during the leveling process.
  2. Wear Safety Gear: Wear safety glasses and gloves to protect yourself while working on the garage door.

Step 2: Inspect the Door and Components

  1. Observe the Door: Carefully observe the garage door to identify how and where it is crooked. Note if it’s tilting to one side, sagging in the middle, or misaligned in any way.
  2. Check Tracks and Rollers: Inspect the tracks and rollers for any damage, misalignment, or debris that could be causing the door to be crooked.

Step 3: Identify the Problem

  1. Check for Obstructions: Make sure there are no objects or debris blocking the door’s movement, which could be causing it to be unlevel.
  2. Evaluate Spring Tension: Uneven spring tension on the garage door can lead to misalignment. Check if the springs are balanced and have the correct tension. If in doubt, consult a professional.

Step 4: Adjust the Tracks

  1. Loosen Bolts: Loosen the bolts that secure the tracks to the frame. Don’t fully remove them; just loosen them enough to allow adjustments.
  2. Level the Tracks: Use a level to ensure that the tracks are plumb (vertically straight) on both sides. Make any necessary adjustments to align them correctly.
  3. Tighten Bolts: Once the tracks are aligned, tighten the bolts securely to maintain the proper position.

Step 5: Adjust the Rollers

  1. Raise the Door: If the door is sagging in the middle, raise it manually by placing a block of wood underneath and lifting it until it’s level.
  2. Adjust Roller Height: Using a wrench, adjust the roller brackets on the sides of the door to ensure that the rollers are sitting evenly in the tracks. This helps distribute the weight of the door more evenly.

Step 6: Check Hinges and Panels

  1. Inspect Hinges: Examine the hinges that connect the door panels. If any hinges are loose or damaged, tighten or replace them as needed.
  2. Adjust Hinge Alignment: If the door panels are misaligned, you can slightly adjust the hinges by loosening the hinge screws and tapping the hinge plate to align the panels properly.

Step 7: Test the Door’s Movement

  1. Open and Close: Test the door’s movement by opening and closing it manually. Pay attention to any resistance, rubbing, or misalignment issues.
  2. Check for Even Gaps: As the door opens and closes, observe the gaps between the door panels and the frame. Ensure that the gaps are even and consistent on both sides.

Step 8: Reconnect the Opener

  1. Reconnect Power: Once you’re satisfied with the manual operation of the door and its alignment, reconnect the garage door opener to the power source.
  2. Test Opener Operation: Test the opener to make sure it smoothly opens and closes the garage door without any resistance or abnormal sounds.

Step 9: Regular Maintenance

  1. Perform Routine Checks: Periodically inspect the garage door, tracks, rollers, hinges, and other components for signs of wear or misalignment. Address any issues promptly to prevent future problems.

Step 10: Seek Professional Help

  1. Consult Experts: If you’re unsure about any step or if the door’s alignment issues persist, it’s advisable to consult a professional garage door technician. They have the expertise to diagnose and fix complex alignment problems.

In conclusion, leveling a crooked Garage Door Repair Colleyville TX involves a combination of adjustments to tracks, rollers, hinges, and panels. By carefully following these steps and taking your time to make precise adjustments, you can ensure that your garage door operates smoothly, looks better, and remains aligned for optimal performance.

Colleyville Gates & Garage Doors

6508 Colleyville Blvd, Colleyville, TX 76034, United States

1-817-755-6231

How To Drywall Around An Existing Garage Door – BH Garage Doors and Gates

Drywalling around an existing Garage Door Repair Rockwall TX is a manageable DIY project that can enhance the appearance of your garage and provide a finished, clean look.

Whether you’re converting your garage into a living space or just looking to improve its aesthetics, here’s a step-by-step guide on how to drywall around an existing garage door:

Step 1: Gather Your Tools and Materials
Before you begin, ensure you have all the necessary tools and materials ready:

Tools:

  • Measuring tape
  • Level
  • Stud finder
  • Utility knife
  • Drywall saw
  • Screwdriver or drill
  • Drywall taping knife
  • Drywall joint compound
  • Sandpaper or sanding block
  • Safety goggles
  • Dust mask

Materials:

  • Drywall panels
  • Drywall screws
  • Drywall joint tape
  • Corner bead (if needed)
  • Primer and paint

Step 2: Measure and Plan
Start by measuring the dimensions around the existing garage door. Measure the height and width of the space you’ll be drywalling, as well as the distance from the edges of the door frame to the nearest studs. Use a level and stud finder to locate the studs in the surrounding wall.

Step 3: Cut and Install Drywall Panels
Cut the drywall panels to fit the measured dimensions. It’s best to have a helper hold the drywall in place while you secure it. Use drywall screws to attach the panels to the studs. Space the screws about 12 to 16 inches apart along the studs, ensuring they’re flush with the drywall surface.

Step 4: Install Corner Bead (If Needed)
If the edges around the garage door opening are not perfectly square or if you want to add additional reinforcement, install metal corner bead along the corners of the drywall. Secure the corner bead with drywall screws.

Step 5: Tape and Mud the Joints
Apply drywall joint tape over the seams where the drywall panels meet. Use a taping knife to spread a thin layer of joint compound over the tape, feathering the edges to create a smooth transition. Allow the joint compound to dry according to the manufacturer’s instructions.

Step 6: Sand and Repeat (If Necessary)
After the joint compound is dry, sand the surface to create a smooth finish. If any imperfections are visible, repeat the taping and mudding process until the seams are invisible and the surface is even.

Step 7: Apply Additional Layers of Joint Compound
To achieve a seamless look, apply additional coats of joint compound, each wider than the previous one. Feather the edges as you go to blend the compound into the surrounding wall. Sand between coats for a smooth finish.

Step 8: Sand and Finish
Once the joint compound is completely dry and the surface is smooth, sand it lightly to remove any bumps or rough spots. Wipe away dust with a clean cloth.

Step 9: Prime and Paint
Before painting, apply a coat of primer to the drywall. Primer helps create an even surface and ensures that the paint adheres properly. Once the primer is dry, apply your chosen paint color to match the rest of the garage.

Step 10: Clean Up
Clean up the workspace by removing any dust and debris. Dispose of waste materials properly.

Step 11: Reattach Garage Door Hardware
If you removed any hardware or trim around the garage door before starting the project, reattach them carefully. Make sure everything is secure and properly aligned.

Step 12: Finishing Touches
As a final touch, consider adding baseboards or molding around the bottom edges of the drywalled area to complete the look and provide a polished appearance.

Safety Precautions:

  • Always wear safety goggles and a dust mask when cutting, sanding, or working with drywall to protect your eyes and lungs.
  • Use caution when working with power tools and sharp objects.
  • If you’re not comfortable with any part of the project, it’s best to consult a professional for assistance.

In conclusion, drywalling around an existing Garage Door Repair Rockwall TX is a project that can enhance the aesthetics of your garage and create a more finished appearance. By following these steps carefully and paying attention to safety precautions, you can achieve a professional-looking result and add value to your space.

BH Garage Doors and Gates

1-972-807-7936

Page 3 of 21

Powered by WordPress & Theme by Anders Norén