Local Businesses Blog in Texas

Cleveland Texas

Tag: Garage Door Repair Suwanee GA

How To Program Universal Garage Door Remote – Southern Home Creations Garage Doors & Openers


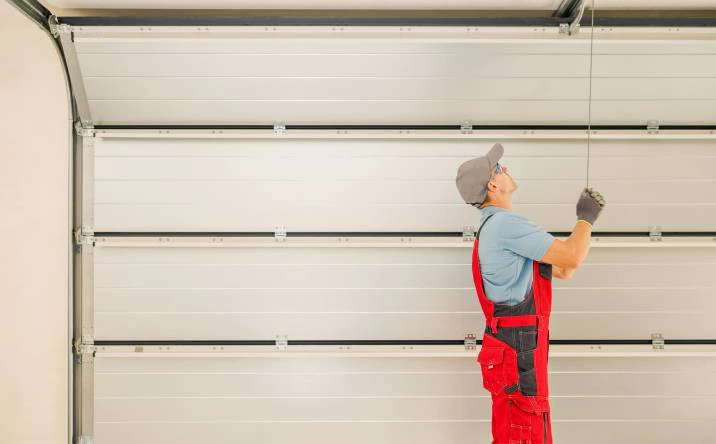
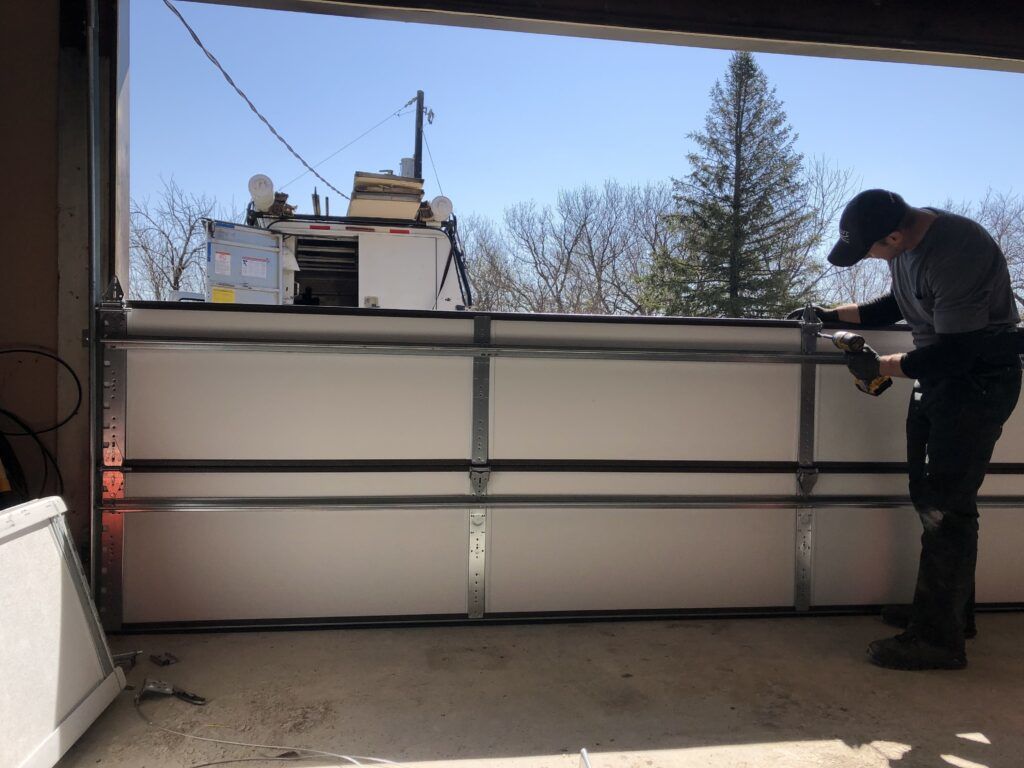
Programming a universal Garage Door Repair Suwanee GA allows you to operate multiple garage door openers from different manufacturers with a single device.

Here’s a detailed guide on how to program a universal garage door remote:

1. Identify Your Garage Door Opener Model:

  • Before you begin, determine the make and model of your garage door opener. This information will help you find the correct programming instructions for your specific opener.

2. Choose a Compatible Universal Remote:

  • Select a universal garage door remote that is compatible with your garage door opener model. Ensure that the remote supports the frequency and technology used by your opener (e.g., 315MHz, 390MHz, rolling code, dip switch, etc.).

3. Prepare the Remote:

  • Remove the battery cover from the universal remote and insert the appropriate batteries according to the manufacturer’s instructions. Replace the battery cover securely.

4. Locate the Learn Button on the Opener:

  • Find the “Learn” or “Program” button on your garage door opener unit. This button is usually located on the back or side of the opener motor housing.

5. Put the Opener into Programming Mode:

  • Press and release the “Learn” button on the garage door opener. The indicator light on the opener should illuminate or start blinking, indicating that it is in programming mode and ready to receive a new remote signal.

6. Program the Universal Remote:

  • Follow the specific programming instructions provided by the manufacturer of the universal remote. Typically, this involves pressing and holding a specific button or sequence of buttons on the remote while aiming it at the opener unit.

7. Test the Remote:

  • Once programmed, test the universal remote by pressing the button(s) corresponding to the desired garage door function (e.g., open, close, stop). The garage door should respond accordingly by moving in the desired direction.

8. Program Additional Buttons (Optional):

  • If your universal remote has multiple buttons for controlling different garage doors or functions, repeat the programming process for each button following the same steps outlined above.

9. Finalize Programming:

  • After programming all desired buttons, press the “Learn” button on the opener unit again to exit programming mode. The indicator light on the opener should stop blinking, indicating that the programming process is complete.

10. Mount the Remote (Optional):

  • If desired, attach the universal remote to your vehicle’s visor or another convenient location using the provided mounting hardware or adhesive strips.

11. Troubleshooting:

  • If the remote does not work as expected, double-check the programming instructions and ensure that you followed each step correctly. You may need to repeat the programming process or consult the universal remote’s instruction manual for troubleshooting tips.

Conclusion:

  • Garage Door Repair Suwanee GA By following these steps and referring to the specific instructions provided with your universal remote, you can quickly and easily program it to work with your garage door opener.

Southern Home Creations Garage Doors & Openers

4110 Tench Rd Suite D, Suwanee, GA 30024, United States

1-770-831-0301

https://maps.app.goo.gl/1sSeEcj3whKsA8wN7

How To Program Second Chamberlain Garage Door Opener – Southern Home Creations Garage Doors & Openers

Programming a second Chamberlain Garage Door Repair Suwanee GA involves a series of steps to synchronize the opener with your garage door and remote control devices.

Here’s a detailed guide on how to program a second Chamberlain garage door opener:

1. Locate the Learn Button:

  • Before programming your second Chamberlain garage door opener, locate the “Learn” button on the opener motor unit. This button is typically located on the back or side of the motor unit and may be labeled as “Learn” or “Program.”

2. Clear Existing Codes (Optional):

  • If you’re reprogramming the garage door opener or adding a new remote control, it’s recommended to clear existing codes from the opener memory. Press and hold the “Learn” button on the motor unit until the indicator light turns off, indicating that existing codes have been erased.

3. Program Remote Controls:

  • To program a remote control device to the Chamberlain garage door opener, follow these steps:
    • Press and release the “Learn” button on the motor unit. The indicator light will illuminate, indicating that the opener is in programming mode.
    • Within 30 seconds, press and hold the button on the remote control that you wish to program. Hold the button until the indicator light on the motor unit flashes, indicating that the remote control has been successfully programmed.
    • Repeat this process for each additional remote control device you wish to program to the garage door opener.

4. Program Keyless Entry Keypad (If Applicable):

  • If your Chamberlain garage door opener is equipped with a keyless entry keypad, you can program it using similar steps:
    • Press and release the “Learn” button on the motor unit.
    • Within 30 seconds, enter your desired PIN code on the keypad and press the “Enter” or “Learn” button. The indicator light on the motor unit should flash, indicating that the keypad has been successfully programmed.

5. Test the Remote Controls and Keypad:

  • After programming remote controls and keypads, test their functionality to ensure they operate the garage door opener correctly. Stand inside your garage and press the programmed buttons on the remote controls or enter the PIN code on the keypad to open and close the garage door.

6. Adjust Travel Limits and Force Settings (If Necessary):

  • After programming the remote controls and keypad, it’s a good idea to test the garage door’s travel limits and force settings to ensure smooth and safe operation. Refer to the opener’s user manual for instructions on adjusting travel limits and force settings as needed.

7. Finalize Programming:

  • Once you’ve programmed all remote controls and keypad devices and verified their functionality, press the “Learn” button on the motor unit to exit programming mode. The indicator light should turn off, indicating that the programming process is complete.

8. Troubleshooting:

  • If you encounter any issues during the programming process, such as the indicator light not flashing or remote controls not working, double-check the programming steps and ensure that you’re within range of the opener. If problems persist, refer to the opener’s user manual for troubleshooting tips or contact customer support for assistance.

Conclusion:

  • By following the steps outlined above and referring to the opener’s user manual for guidance, you can program your second Chamberlain Garage Door Repair Suwanee GA with ease and enjoy convenient access to your garage.

Southern Home Creations Garage Doors & Openers

4110 Tench Rd Suite D, Suwanee, GA 30024, United States

1-770-831-0301

https://maps.app.goo.gl/1sSeEcj3whKsA8wN7

How To Remove Garage Door Panels – Southern Home Creations Garage Doors & Openers

Garage Door Repair Suwanee GA While the specific steps may vary depending on the type and model of the garage door, as well as the method of panel attachment, the general process involves several common steps.

https://www.google.com/maps?cid=17644958217432067418

Here’s a comprehensive guide on how to remove garage door panels:

  1. Preparation and Safety Measures:Before beginning the process of removing garage door panels, it’s essential to take safety precautions and gather the necessary tools and materials. Ensure you have the following items:
    • Safety glasses or goggles to protect your eyes from debris.
    • Work gloves to protect your hands from sharp edges and pinch points.
    • A ladder or step stool to access the garage door safely.
    • A power drill with appropriate bits.
    • Screwdrivers (Phillips and flathead) or socket wrenches.
    • A helper to assist with lifting and maneuvering heavy panels.
  2. Disconnect the Garage Door Opener:Before working on the garage door, disconnect the power to the automatic garage door opener to prevent accidental operation. This can typically be done by unplugging the opener from the power outlet or turning off the circuit breaker that controls the opener.
  3. Identify the Panels to Remove:Inspect the garage door to identify the specific panels that need to be removed. Depending on the design of the door and the extent of the repair or replacement, you may need to remove one or more panels.
  4. Release the Tension on the Springs (if applicable):If your garage door is equipped with torsion springs or extension springs, it’s crucial to release the tension on the springs before removing any panels. Follow the manufacturer’s instructions or consult a professional to safely release the tension on the springs to avoid injury.
  5. Remove the Hinges and Hardware:Using a power drill or screwdriver, remove the screws or bolts that secure the hinges and hardware to the panels. Start by removing the hardware from the bottom panel and work your way up to the top panel. Keep track of the hardware and set it aside in a safe place for reinstallation later.
  6. Disconnect the Panels from Each Other:Depending on the design of the garage door, the panels may be connected to each other using interlocking joints or fasteners. Carefully disconnect the panels from each other by lifting them upward or sliding them out of the tracks, following the manufacturer’s instructions.
  7. Release the Panels from the Tracks:Once the panels are disconnected from each other, you can release them from the tracks. Depending on the type of track system, you may need to lift the panels upward to disengage them from the tracks or slide them sideways to remove them.
  8. Remove the Bottom Panel:If you’re replacing the bottom panel or need to access the area underneath the garage door, start by removing the bottom panel first. Disconnect it from the tracks and carefully lower it to the ground, ensuring it doesn’t get damaged during removal.
  9. Repeat the Process for Additional Panels:If you need to remove multiple panels, repeat the process outlined above for each panel, working your way up from the bottom of the door to the top. Take care to label or mark the panels as you remove them to ensure they can be reinstalled in the correct order.
  10. Inspect and Clean the Panels and Tracks:Once the panels are removed, take the opportunity to inspect them for any signs of damage or wear. Clean the panels and tracks thoroughly using a mild detergent and water solution to remove dirt, debris, and grease buildup.
  11. Store the Panels Safely:If you’re removing the panels temporarily for repair or replacement, store them in a clean, dry, and secure location to prevent damage or warping. Avoid placing heavy objects on top of the panels and protect them from moisture and extreme temperatures.
  12. Reinstalling the Panels (if necessary):Once the repair or maintenance work is complete, follow the reverse process to reinstall the panels. Ensure the panels are properly aligned and secured in the tracks, and reattach the hinges and hardware using the appropriate screws or bolts.
  13. Test the Garage Door Operation:After reinstalling the panels, test the operation of the garage door to ensure it opens and closes smoothly without any issues. Check for proper alignment, balance, and clearance to ensure the door operates safely and effectively.

Garage Door Repair Suwanee GA However, if you’re unsure about tackling the task yourself or if the repairs require specialized knowledge or equipment, it’s always best to consult a professional garage door technician for assistance.

Southern Home Creations Garage Doors & Openers

4110 Tench Rd Suite D, Suwanee, GA 30024, United States

1-770-831-0301

How To Change Battery In Chamberlain Garage Door Opener – Southern Home Creations Garage Doors & Openers

Chamberlain Garage Door Repair Suwanee GA are known for their reliability and convenience, providing homeowners with easy access to their garage. Like all electronic devices, Chamberlain garage door openers require power to function, and many models use batteries to operate certain features.

In this comprehensive guide, we’ll walk you through the step-by-step process of changing the battery in a Chamberlain garage door opener to ensure continued smooth operation.

Understanding Chamberlain Garage Door Openers

Chamberlain offers a variety of garage door opener models, including belt-drive, chain-drive, and screw-drive systems. While the specific design and features may vary between models, most Chamberlain garage door openers utilize batteries to power remote controls, wall-mounted keypads, and other accessories.

Tools and Materials Needed

Before you begin changing the battery in your Chamberlain garage door opener, gather the following tools and materials:

  • Replacement battery (check the owner’s manual for the correct battery type)
  • Screwdriver (Phillips or flathead)
  • Safety glasses (optional)

Step-by-Step Guide to Changing the Battery

Follow these steps to change the battery in your Chamberlain garage door opener:

1. Safety First

  • Before you begin any work on your garage door opener, disconnect the power by unplugging the unit from the electrical outlet or switching off the circuit breaker. This will prevent accidental operation and reduce the risk of electric shock.

2. Locate the Battery Compartment

  • Identify the battery compartment on your Chamberlain garage door opener. The location of the battery compartment may vary depending on the model of your opener, but it is typically located near the motor housing or on the back of the unit.

3. Open the Battery Compartment

  • Use a screwdriver to remove any screws or fasteners securing the battery compartment cover. Set the screws aside in a safe place to prevent them from getting lost.

4. Remove the Old Battery

  • Carefully remove the old battery from the compartment, taking care to note its orientation and polarity. Chamberlain garage door opener batteries are typically installed with the positive (+) and negative (-) terminals facing in specific directions.

5. Install the New Battery

  • Insert the new battery into the compartment, ensuring that it is oriented correctly with the positive and negative terminals matching the markings inside the compartment. Press the battery firmly into place to ensure a secure connection.

6. Close the Battery Compartment

  • Replace the battery compartment cover and secure it with the screws or fasteners that you removed earlier. Tighten the screws securely to prevent the cover from coming loose during operation.

7. Reconnect Power

  • Once you have replaced the battery and closed the battery compartment, reconnect the power to your Chamberlain garage door opener by plugging in the unit or switching on the circuit breaker.

8. Test Operation

  • Test the operation of your garage door opener by using the remote control or wall-mounted keypad to open and close the door. Ensure that the opener responds correctly and that all functions are working as expected.

Additional Tips and Considerations

  • Refer to the owner’s manual for your specific Chamberlain garage door opener model for detailed instructions on replacing the battery.
  • Regularly check and replace the battery in your garage door opener remote controls and keypads to ensure reliable operation.

Conclusion:

Changing the battery in your Chamberlain Garage Door Repair Suwanee GA is a simple yet essential maintenance task that can help ensure continued smooth operation of your garage door system. By following the step-by-step guide outlined above and taking proper safety precautions, you can replace the battery in your Chamberlain garage door opener with ease and confidence.

Southern Home Creations Garage Doors & Openers

4110 Tench Rd Suite D, Suwanee, GA 30024, United States

1-770-831-0301

How To Install Garage Door Cables – Southern Home Creations Garage Doors & Openers

Installing Garage Door Repair Suwanee GA is a task that, while manageable for some DIY enthusiasts, requires attention to detail and adherence to safety guidelines.

Garage door cables play a crucial role in the smooth operation of the door, aiding in its balance and stability. Here’s a comprehensive guide to help you through the process of installing garage door cables, step by step:

: Gather Tools and Materials

Before starting the installation, gather the necessary tools and materials. You’ll need a ladder, winding bars, a socket set, vice grips, cable clamps, safety glasses, gloves, and, most importantly, the correct replacement cables for your specific garage door model.

: Ensure Safety

Safety should be your top priority when working with garage doors. Disconnect the power to the garage door opener to prevent accidental activation. Ensure the door is in the closed position, and wear safety glasses and gloves to protect yourself from any potential hazards.

: Identify the Right Cables

Make sure you have the correct replacement cables for your garage door. Cables come in various sizes and configurations, so refer to your garage door’s manual or consult with a professional if you’re uncertain.

: Release Tension from the Springs

Before attempting to install new cables, release tension from the garage door springs. Insert a winding bar into one of the winding cone holes and turn it slowly until the tension is released. Repeat this process for both sides of the garage door.

: Remove Old Cables

Once the tension is released, carefully remove the old cables from the bottom brackets. Use caution, as there may still be some residual tension in the system. If you’re unsure about handling this step, consider seeking professional assistance.

: Thread New Cables

Thread the new cables through the bottom bracket and up through the vertical track. Ensure the cables are properly aligned, and use vice grips to secure them temporarily in place.

: Attach Cable to the Drum

Maneuver the new cables over the garage door drum. Follow the cable path specified in your garage door manual. Proper cable placement on the drum is crucial for the door’s balanced operation.

: Adjust Cable Tension

Carefully adjust the tension on the new cables. Use winding bars to turn the adjusting screws on the bottom brackets, tightening the cables until they are snug. Be cautious not to over-tighten, as it may lead to imbalances in the door’s operation.

: Secure Cable with Cable Clamp

Once the cables are properly tensioned, secure them to the bottom bracket with cable clamps. Ensure the clamps are tightened securely to prevent any slippage.

: Repeat for the Other Side

Repeat the cable installation process on the other side of the garage door. Consistency in cable tension and placement is essential for the balanced operation of the door.

: Test the Door

After installing and securing the new cables, manually lift and lower the garage door to test its operation. The door should move smoothly, without any unusual noises or resistance. If there are issues, reevaluate the cable placement and tension.

: Reconnect the Garage Door Opener

If you disconnected the garage door opener, reconnect it and test the door using the automatic opener. Ensure that the opener can lift the door smoothly, and observe for any issues with the cable operation.

: Perform Regular Maintenance

Regular maintenance is crucial for the longevity and safe operation of your garage door cables. Periodically inspect the cables for signs of wear, fraying, or damage. Lubricate moving parts as recommended by the manufacturer.

: Consider Professional Assistance

If you are uncomfortable or uncertain about any step in the cable installation process, consider seeking professional assistance. Working with garage door components can be hazardous, and mistakes may lead to injuries or damage to the door.

Conclusion:

By following these detailed steps and prioritizing safety, you can successfully install new cables on your Garage Door Repair Suwanee GA. However, it’s crucial to approach this task with caution and, when in doubt, consult with a professional garage door technician. Safety and precision are paramount in ensuring the reliable and safe operation of your garage door system.

Southern Home Creations Garage Doors & Openers

4110 Tench Rd Suite D, Suwanee, GA 30024

1-770-831-0301

My Guide to Preventing Garage Door Water Leaks During Heavy Rain – Southern Home Creations Garage Doors & Openers

Living in an area prone to heavy rainstorms, I’ve experienced the frustration and inconvenience of dealing with garage door water leaks firsthand. Not only can these leaks cause damage to belongings stored in the garage, but they can also lead to structural issues if left unaddressed.

As stated in Garage Door Repair Suwanee GA, over the years, I’ve learned valuable tips and techniques for preventing garage door water leaks during heavy rain, and I’m excited to share them with you in this comprehensive guide.

Understanding the Causes of Garage Door Water Leaks:

Before delving into prevention strategies, it’s essential to understand the common causes of garage door water leaks. Some of the primary culprits include:

  1. Improper Installation: Poor installation or inadequate sealing around the garage door frame can allow water to seep in during heavy rain.
  2. Damaged Weatherstripping: Worn or damaged weatherstripping along the bottom of the garage door can create gaps where water can infiltrate.
  3. Cracked or Missing Caulking: Cracks or gaps in the caulking around the perimeter of the garage door frame can provide entry points for water.
  4. Poor Drainage: Inadequate drainage around the garage or improper grading of the ground can lead to pooling water that seeps under the garage door.

Prevention Strategies for Garage Door Water Leaks:

Now that we’ve identified the common causes of garage door water leaks, let’s explore effective prevention strategies:

  1. Inspect and Maintain Weatherstripping: Regularly inspect the weatherstripping along the bottom of the garage door for signs of wear or damage. Replace any worn or damaged weatherstripping to ensure a tight seal against the garage floor.
  2. Seal Gaps and Cracks: Use caulking or weatherproof sealant to seal any gaps or cracks around the perimeter of the garage door frame. Pay close attention to areas where the frame meets the walls and corners, as these are common entry points for water.
  3. Install a Garage Door Threshold Seal: Consider installing a threshold seal along the bottom of the garage door to create a watertight barrier. Threshold seals are available in various materials, including rubber and aluminum, and are designed to prevent water from seeping under the door.
  4. Improve Drainage: Ensure that the ground around the garage is properly graded to promote drainage away from the structure. Consider installing a French drain or trench along the perimeter of the garage to redirect water away from the door.
  5. Check and Adjust Garage Door Alignment: Inspect the alignment of the garage door to ensure that it sits flush against the weatherstripping when closed. Adjust the door tracks if necessary to eliminate any gaps that may allow water to enter.
  6. Invest in a Garage Door Water Barrier: For added protection against water intrusion, consider installing a garage door water barrier or guard. These products are designed to divert water away from the garage door and prevent leaks during heavy rainstorms.
  7. Perform Regular Maintenance: Schedule routine maintenance checks for your garage door system, including lubricating hinges and tracks, tightening bolts and screws, and inspecting seals and weatherstripping. Addressing minor issues promptly can help prevent water leaks and prolong the life of your garage door.

Additional Tips for Dealing with Heavy Rain:

In addition to implementing prevention strategies, there are several steps you can take to minimize the impact of heavy rain on your garage:

  1. Keep Gutters and Downspouts Clear: Ensure that gutters and downspouts are free of debris to allow for proper drainage of rainwater away from the garage.
  2. Use Sandbags or Flood Barriers: In anticipation of heavy rain, place sandbags or flood barriers along the perimeter of the garage door to create a barrier against water intrusion.
  3. Elevate Stored Items: If possible, elevate belongings stored in the garage off the floor to protect them from water damage in the event of a leak.
  4. Monitor Weather Forecasts: Stay informed about upcoming weather forecasts and be prepared to take proactive measures to protect your garage during heavy rainstorms.

Conclusion:

Overall, based from Garage Door Repair Suwanee GA, preventing garage door water leaks during heavy rain requires a combination of proactive maintenance, proper sealing, and strategic planning. By implementing the prevention strategies outlined in this guide and taking additional precautions when heavy rain is forecasted, you can minimize the risk of water intrusion and protect your garage and belongings from damage. Remember to regularly inspect and maintain your garage door system to ensure optimal performance and weather resistance. With a little effort and foresight, you can keep your garage dry and secure even during the most torrential rainstorms.

Southern Home Creations Garage Doors & Openers

4110 Tench Rd Suite D, Suwanee, GA 30024, United States

770-831-0301

How to Align Garage Door Sensors-Southern Home Creations Garage Doors & Openers

Aligning Garage Door Repair sensors is an important task to ensure the smooth and safe operation of your garage door. Misaligned sensors can prevent the door from closing or cause it to reverse unexpectedly, posing a safety hazard.

Here are step-by-step instructions on how to align garage door sensors:

  1. Prepare the tools: Before you begin, gather the necessary tools for the task. You’ll need a ladder, a measuring tape, a wrench or pliers, and a screwdriver.
  2. Safety first: Always prioritize safety when working with garage doors. Disconnect the power to the garage door opener to prevent accidental activation during the alignment process.
  3. Locate the sensors: The garage door sensors are usually mounted on both sides of the garage door, near the ground. They consist of a sending unit (transmitter) and a receiving unit (receiver). The sending unit emits an infrared beam, and the receiver detects the beam.
  4. Check sensor alignment: Inspect the sensors to determine if they are properly aligned. Look for any obstructions or debris that may be blocking the sensor’s line of sight. Clear away any dirt, cobwebs, or objects that could interfere with the beam.
  5. Measure the sensor height: Use a measuring tape to ensure that both sensors are at the same height. Measure from the ground to the center of each sensor and adjust them if necessary. Typically, the sensors should be mounted around 6 inches above the floor.
  6. Adjust the sensor brackets: The sensor brackets can be adjusted to fine-tune the alignment. Loosen the screws or bolts holding the brackets in place using a wrench or pliers. Gently move the brackets up, down, or sideways to align them properly. Once aligned, tighten the screws or bolts securely.
  7. Check the sensor alignment again: After adjusting the brackets, verify that the sensors are still aligned correctly. Use a level or plumb line to ensure that both sensors are perfectly vertical. Adjust the brackets further if needed.
  8. Test the sensor alignment: With the power still disconnected, test the sensor alignment by trying to close the garage door. Press the button on the garage door opener to initiate the closing process. If the sensors are properly aligned, the door should close smoothly without any issues.
  9. Fine-tune the alignment: If the door doesn’t close or reverses immediately after pressing the button, there may still be alignment issues. Repeat the adjustment process, making small adjustments to the sensor brackets until the door operates correctly.
  10. Secure the sensors: Once the alignment is satisfactory, secure the sensors in their final positions. Tighten all screws or bolts on the brackets to ensure they stay in place.
  11. Restore power: Once you have finished aligning the sensors and securing them, reconnect the power to the garage door opener. Test the door again to verify that it operates correctly.
  12. Regular maintenance: To prevent future misalignment, regularly inspect and clean the sensors. Remove any dirt or debris that may accumulate over time.

By following these steps, you should be able to align your Garage Door Repair sensors properly. Remember to prioritize safety at all times and consult the manufacturer’s instructions if you encounter any specific issues or complications.

Southern Home Creations Garage Doors & Openers

4110 Tench Rd Suite D, Suwanee, GA 30024, United States

1-770-831-0301

Powered by WordPress & Theme by Anders Norén