Local Businesses Blog in Texas

Cleveland Texas

Tag: Garage Door Repair Bedford TX

How To Reset Toyota Highlander Garage Door Opener – Bedford Gates & Garage Doors

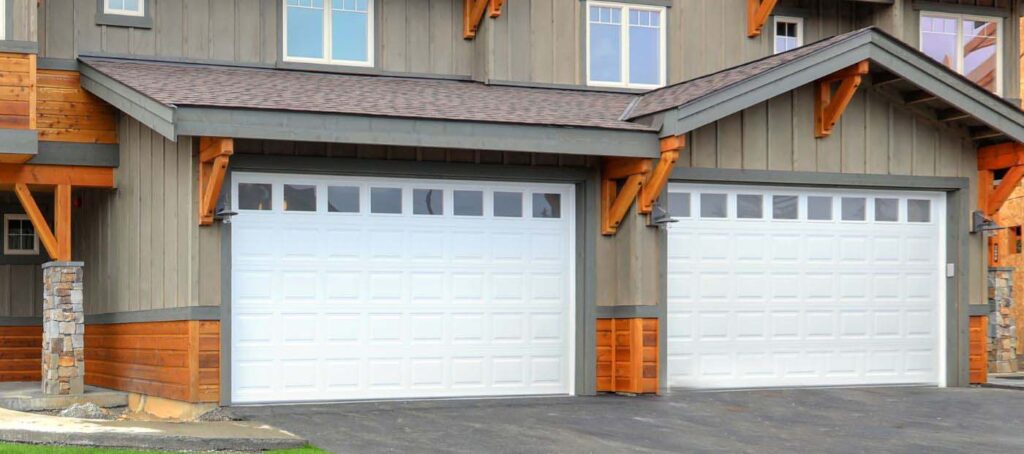
Resetting the Garage Door Repair Bedford TX is a relatively straightforward process that involves a series of steps to clear existing programming and reprogram the HomeLink system.

Follow these detailed instructions to reset the garage door opener on your Toyota Highlander:

  1. Prepare for Reset: Ensure that your Toyota Highlander is parked in a safe and accessible location. Make sure you have the remote control for your garage door opener and the owner’s manual for your Highlander.
  2. Locate HomeLink Buttons: Find the HomeLink buttons in your Highlander. These buttons are typically located on the rearview mirror or the overhead console. There are three HomeLink buttons that you can program for different garage doors.
  3. Clear Existing Programming: Press and hold the first and third HomeLink buttons simultaneously. Hold them for about 20 seconds until the indicator light on the HomeLink buttons starts flashing rapidly. This action clears any existing programming.
  4. Choose a Button for Programming: Decide which HomeLink button you want to program for your garage door opener. You can choose any of the three buttons based on your preference.
  5. Hold Remote and HomeLink Close: Take the remote control for your garage door opener and hold it about 1-3 inches away from the HomeLink buttons in your Highlander.
  6. Simultaneously Press Remote and HomeLink Buttons: While holding the remote close to the HomeLink buttons, press the button on the remote and the chosen HomeLink button simultaneously. Hold both buttons down until the HomeLink indicator light starts flashing slowly.
  7. Training Mode: After a few seconds, the indicator light on the HomeLink buttons will change from a slow flash to a rapid flash. This indicates that the HomeLink system is in training mode and ready to learn the garage door opener’s signal.
  8. Program the Garage Door Opener: Locate the “Learn” or “Train” button on your garage door opener motor. Press this button. You typically have around 30 seconds to return to your Highlander and complete the programming.
  9. Test the HomeLink System: Press the programmed HomeLink button in your Highlander and observe if your garage door responds. If the programming is successful, the garage door should start moving.
  10. Repeat if Necessary: If the garage door doesn’t respond, repeat the process. It may take a couple of tries to ensure successful programming.
  11. Finalize Programming: Once the garage door responds to the HomeLink button, press and hold the button for a few seconds until the indicator light turns solid. This final step completes the programming process.
  12. Refer to Owner’s Manual: Consult your Highlander’s owner’s manual for any specific instructions or variations that may apply to your model. The manual may provide additional guidance or troubleshooting tips.

By following these detailed steps, you can successfully reset and program the Garage Door Repair Bedford TX, providing you with convenient access to your garage.

Bedford Gates & Garage Doors

817-886-3064

How Wide Is A Single Garage Door – Bedford Gates & Garage Doors

 Garage Door Repair Bedford TX come in various sizes, but a standard single garage door typically has a width of 8 to 9 feet.

The most common width is 9 feet, providing enough space for a standard-sized car to comfortably enter and exit the garage. The height of a standard garage door is usually 7 to 8 feet, accommodating most vehicles and providing sufficient clearance.

Now, let’s delve into the importance of choosing the right size for your garage door. Selecting the appropriate width is crucial for ensuring that your garage door fits seamlessly into the architectural design of your home while meeting your functional needs.

The width of a garage door is influenced by factors such as the size of the vehicles you plan to park inside, the available space in your garage, and the overall aesthetic of your home. If you have a larger vehicle, such as an SUV or a pickup truck, you may want to opt for a wider garage door to ensure easy entry and exit.

Beyond the functional aspects, garage doors also contribute significantly to the curb appeal of your home. The width of the garage door plays a pivotal role in the overall visual balance of the facade. A well-proportioned garage door enhances the architectural harmony of your house, creating a cohesive and attractive exterior.

In terms of materials, garage doors come in a variety of options, including steel, wood, aluminum, and fiberglass. Each material has its unique characteristics, influencing factors such as durability, maintenance requirements, and cost. The width of the garage door can impact the choice of materials, as larger doors may require sturdier materials to ensure longevity and stability.

Now, let’s discuss the technological advancements in garage door design. Modern garage doors often feature automation and smart technology, allowing homeowners to control and monitor their garage doors remotely. This includes smartphone apps that enable you to open and close the garage door with a simple tap on your device. The width of the garage door may influence the type of automation system you choose, as larger doors may require more robust and sophisticated mechanisms.

In addition to automation, insulation is another crucial aspect of garage door design. The width of the garage door can affect its insulation capabilities, influencing factors such as energy efficiency and temperature regulation inside the garage. Insulated garage doors help maintain a more consistent temperature, preventing extreme heat or cold from affecting the interior space.

Now, let’s shift our focus to the installation process of garage doors. The width of the garage door plays a significant role in determining the complexity of the installation. Larger doors may require additional support structures and careful planning to ensure proper functionality. Professional installation is often recommended to guarantee that the garage door is securely and accurately installed.

When it comes to design options, garage doors offer a wide range of styles, colors, and finishes. The width of the garage door can impact the visual perception of these design elements. For example, a wider door may provide a larger canvas for showcasing intricate panel designs, windows, or decorative hardware.

Garage doors are not only functional elements but also contribute to the security of your home. The width of the garage door can influence its security features, including the type of locking mechanisms and reinforcement against forced entry. Choosing a garage door with robust security features is essential for ensuring the safety of your vehicles and belongings stored in the garage.

In conclusion, the width of a single Garage Door Repair Bedford TX is a critical consideration that goes beyond mere dimensions. It affects the overall aesthetics, functionality, and technological features of the door. Whether you prioritize visual appeal, technological innovation, or security, selecting the right width is a key decision in enhancing the performance and appearance of your garage door

Garage Door Repair in Bedford, TX

817 – 886 – 3064

How To Remove A Dent From A Garage Door – Bedford Gates & Garage Doors

Removing a dent from a Garage Door Repair Bedford TX may seem like a daunting task, but with the right tools and techniques, it can be a manageable DIY project.

Here’s a step-by-step guide to help you restore your garage door to its former glory.

Materials Needed:

  1. Plunger
  2. Heat source (hairdryer or heat gun)
  3. Compressed air
  4. Dry ice
  5. Boiling water
  6. Rubber mallet
  7. Wooden block
  8. Bucket of soapy water
  9. Clean cloth
  10. Automotive body filler
  11. Sandpaper (various grits)
  12. Primer
  13. Paint matching the garage door color
  14. Paintbrush

: Assess the Damage Examine the dent carefully to determine its size and depth. This will help you decide which method to use for the repair.

: Plunger Method If the dent is shallow and large, start by using a plunger. Moisten the plunger and place it over the dent. Push and pull the plunger to create suction, which should pop the dent out.

: Apply Heat For metal garage doors, use a heat source such as a hairdryer or heat gun to warm the dent area. Once the metal is heated, use a can of compressed air turned upside down to cool and contract the metal, causing it to pop back into shape.

: Use Dry Ice If the dent is on a metal door, you can try the opposite approach. Apply dry ice to the dent to rapidly cool the metal. This may cause the metal to contract and the dent to pop out.

: Boiling Water Method For vinyl or aluminum garage doors, pour boiling water over the dent and immediately use a rubber mallet to gently tap the area from the inside. The heat will make the material more pliable.

: Wooden Block and Mallet Place a wooden block against the dent from the inside of the garage door. Use a rubber mallet to tap the block gently, gradually working out the dent.

: Clean the Surface Once the dent is removed, clean the surface with a bucket of soapy water and a clean cloth to remove any residue or debris.

: Fill and Sand (if necessary) If there are still visible imperfections, use automotive body filler to fill in any remaining gaps. Once the filler is dry, sand the area with progressively finer grits of sandpaper until smooth.

: Prime the Area Apply a coat of primer to the repaired area to ensure proper adhesion of the paint.

: Paint the Door Finally, paint the repaired section with a paint color that matches the rest of the garage door. Use a paintbrush for precise application.

Conclusion:

Repairing a dent in a Garage Door Repair Bedford TX is a task that requires patience and attention to detail. By following these steps and using the appropriate methods for your door’s material, you can restore its appearance and functionality without the need for professional help.

Bedford Gates & Garage Doors

817-886-3064

How To Program Genie Garage Door Openers – Bedford Gates & Garage Doors

Programming a Genie Garage Door Repair Bedford TX is a relatively straightforward process, but it’s essential to follow the specific instructions provided in your Genie opener’s user manual, as different models may have slightly different procedures.

However, I can provide a general guide on how to program a Genie garage door opener. Please note that this guide is for reference, and you should always consult your opener’s manual for model-specific instructions.

Before You Begin:

  1. Make sure your garage door is in good working condition and properly balanced. A misaligned or damaged door can cause safety issues.
  2. Ensure the garage door opener is correctly installed, powered, and has no mechanical problems.

Programming a Genie Garage Door Opener:

: Clear Memory (if necessary)

  • If you are programming a new remote or reprogramming an existing one, start by clearing the opener’s memory.
  • Locate the “Learn” or “Smart” button on your Genie opener. This button is often found on the motor unit.
  • Press and hold the “Learn” button for approximately 10 seconds until the indicator light (usually an LED) on the opener blinks or goes out. This indicates that the memory has been cleared.

: Determine Your Type of Remote

  • Genie garage door openers can use different types of remotes, such as rolling code remotes or fixed code remotes. Consult your user manual to identify your remote type.

: Programming a Fixed Code Remote:

  • For fixed code remotes, locate the “Learn” button on your opener.
  • Press the “Learn” button on the opener. The indicator light should start blinking.
  • Within 30 seconds, press and release the button on your remote that you want to program. The opener’s light should stop blinking and stay on or flash to confirm the remote is programmed.
  • Test the remote to ensure it opens and closes the garage door.

: Programming a Rolling Code Remote:

  • Rolling code remotes are more secure and require a slightly different procedure.
  • Locate the “Learn” button on your opener.
  • Press the “Learn” button on the opener. The indicator light should start blinking.
  • Within 30 seconds, press and release the button on your remote that you want to program. The opener’s light should stop blinking.
  • Press the remote button again within 30 seconds. This action helps to sync the rolling code.
  • The opener’s light should stop blinking or flash to confirm the remote is programmed.
  • Test the remote to ensure it opens and closes the garage door.

: Programming Additional Remotes (if needed):

  • Repeat the above programming steps for any additional remotes you want to program.

: Test the Garage Door Opener:

  • After programming your remotes, test each one to make sure they work correctly.
  • Open the garage door with the remote and close it to confirm proper operation.

: Set Up Additional Features (if applicable):

  • Some Genie openers come with additional features like a wireless keypad or smartphone control. Refer to your manual for instructions on setting up these features.

: Safety Precautions:

  • Ensure that the safety features of your garage door opener, such as the automatic reverse mechanism, are functioning correctly.

Remember, it’s crucial to consult your Genie Garage Door Repair Bedford TX specific user manual, as the steps and terminology may vary based on your model. Additionally, always prioritize safety when working with garage door openers, and if you encounter any issues or difficulties, consider seeking professional assistance.

Bedford Gates & Garage Doors

2201 Harwood Rd, Bedford, TX 76021, United States

1-817-886-3064

How Many Salvaged Hammers For A Garage Door – Bedford Gates & Garage Doors

To answer your question about how many salvaged hammers you might need for a Garage Door Repair Bedford TX it’s important to clarify a few details first. The number of hammers required can vary based on several factors, including the type of garage door, the materials used in its construction, and the specific repairs or installation work you plan to do.

However, I’ll provide you with a comprehensive guide that covers various scenarios and aspects related to garage doors, which should help you estimate the number of salvaged hammers needed.

Types of Garage Doors:

  1. Roll-Up Garage Door: These doors consist of horizontal slats or panels that roll up into a coil when opened. They are commonly found in commercial and industrial settings. For minor repairs, you may need one or two salvaged hammers.
  2. Sectional Garage Door: These doors are made up of separate panels that are hinged together. They move up and down along a track when operated. For basic maintenance or small repairs, a single salvaged hammer might suffice.
  3. Single Panel Garage Door: Less common nowadays, these doors consist of a single, solid piece. If you have this type of garage door, you might need one or two salvaged hammers for maintenance and repairs.

Factors Affecting the Number of Hammers Needed:

  1. Scope of Work: The extent of the repair or installation project plays a significant role in determining how many hammers you’ll need. If you’re replacing an entire garage door, you might need more hammers than if you’re just fixing a few minor issues.
  2. Material: The material of your garage door can impact the tools required. Wooden garage doors may require gentler treatment to avoid damage, whereas steel or aluminum doors may need more force.
  3. Tool Types: Different hammers serve various purposes. For garage door work, a claw hammer, ball-peen hammer, or rubber mallet might be useful. Each of these hammers has specific functions, and you might need more than one type depending on your project.
  4. Experience Level: If you’re an experienced DIY enthusiast or a professional, you might need fewer hammers because you can efficiently utilize the tools you have. In contrast, a novice might need more tools to compensate for a lack of experience.
  5. Safety Gear: Don’t forget to invest in safety gear such as gloves, safety glasses, and hearing protection, especially if you’re dealing with noisy repairs or potential flying debris.

Conclusion:

In conclusion, the number of salvaged hammers needed for a Garage Door Repair Bedford TX project can vary widely. For most standard DIY garage door maintenance or minor repairs, one or two salvaged hammers of different types should suffice. However, for larger projects, unique circumstances, or if you’re working on multiple doors, you might need more hammers or specialized tools. Always prioritize safety and consult with experts or professionals if you’re unsure about the tools required for your specific garage door project.

Bedford Gates & Garage Doors

2201 Harwood Rd, Bedford, TX 76021, United States

1-817-886-3064

How To Disassemble Garage Door Opener Rail – Bedford Gates & Garage Doors

Disassembling a Bedford Gates & Garage Doors opener rail can be necessary for maintenance, repair, or replacement purposes. The rail is the track that guides the garage door as it opens and closes. It’s important to follow proper procedures and safety precautions when disassembling the rail to avoid injury and ensure a successful reassembly.

Here’s a step-by-step guide on how to disassemble a garage door opener rail:

Materials You’ll Need:

  • Adjustable wrench or socket wrench set
  • Screwdriver
  • Lubricant (optional)
  • Safety goggles and gloves

Step-by-Step Guide:

1. Safety First:

  • Before you begin, make sure to disconnect the power to the garage door opener to prevent any accidental activation while working.

2. Gather Necessary Tools:

  • Collect the required tools, including a wrench, screwdriver, and any other tools that may be needed based on your specific garage door opener model.

3. Open the Garage Door:

  • Open the garage door fully to ensure that the rail is accessible and not under tension.

4. Locate the Rail Connections:

  • Identify the points where the rail is connected to the garage door opener unit and to the garage door itself. These are typically secured with bolts or screws.

5. Disconnect from the Opener Unit:

  • Locate the point where the rail is attached to the garage door opener unit. Use the wrench to loosen and remove the bolts or screws securing the rail to the unit.

6. Disconnect from the Garage Door:

  • Next, locate the point where the rail is attached to the garage door. These connections might be near the top of the door or on the door panel itself. Use the wrench to loosen and remove the bolts or screws securing the rail to the garage door.

7. Remove the Rail Sections:

  • Depending on the length of the rail, it might be made up of multiple sections. Carefully remove each section by sliding it out of the connector on the adjacent section.

8. Store the Rail Sections:

  • As you remove the rail sections, set them aside in a safe and organized manner to prevent any damage. You may want to label or mark the sections for easy reassembly.

9. Lubricate (if necessary):

  • While disassembling the rail, you can take the opportunity to lubricate the rail and other moving parts. This can help improve the overall performance and reduce friction.

10. Inspect for Damage:

  • While disassembling, inspect the rail, connectors, and other components for any signs of wear, damage, or rust. Replace any damaged parts as needed.

11. Keep Hardware Organized:

  • As you remove bolts, nuts, and screws, place them in a container or bag to keep them organized. This will make reassembly easier.

12. Safety Precautions:

  • Wear safety goggles and gloves throughout the process to protect yourself from potential hazards.

13. Reassembly:

  • To reassemble the rail, follow the steps in reverse order. Make sure to securely tighten all bolts and screws.

14. Test the Door:

  • After reassembling the rail, test the garage door to ensure that it opens and closes smoothly. Check for any unusual noises or issues.

15. Seek Professional Help (if needed):

  • If you encounter difficulties during disassembly or are unsure about reassembly, consider seeking help from a professional garage door technician.

Conclusion:

Disassembling a Bedford Gates & Garage Doors opener rail requires careful execution and attention to safety. By following the steps outlined above and taking proper safety precautions, you can successfully disassemble the rail for maintenance, repair, or replacement purposes. Always prioritize safety and accurate reassembly to ensure the proper functioning of your garage door opener system.

Bedford Gates & Garage Doors

2201 Harwood Rd, Bedford, TX 76021, United States

1-817-886-3064

Can You Grill In Garage With Door Open-Bedford Best Garage & Overhead Doors

Grilling in a Garage Door Repair Bedford TX with the door open is a topic that raises concerns about safety, ventilation, and potential risks. While it is technically possible to grill in a garage with the door open, there are several important factors to consider before proceeding.

First and foremost, safety should always be the top priority. Grills produce open flames, high temperatures, and potentially hazardous gases such as carbon monoxide. Therefore, it is crucial to ensure proper ventilation when grilling in any enclosed space, including a garage. While opening the garage door can provide some level of ventilation, it may not be sufficient to eliminate the risks completely.

Carbon monoxide (CO) is a colorless and odorless gas that can be emitted during the combustion process. It is highly toxic and can cause serious health issues, including death, if inhaled in high concentrations. Even with the garage door open, there is still a risk of CO accumulation, especially if the garage is not adequately ventilated. CO can linger and build up in enclosed spaces, posing a significant danger to anyone inside, including yourself, family members, or pets.

Additionally, grilling indoors, including in a garage, can also increase the risk of fire. The open flames and heat generated by the grill can easily ignite flammable materials present in the garage, such as gasoline, propane tanks, or other chemicals. These fires can quickly spread, causing property damage, injuries, or even fatalities.

Furthermore, grilling in a garage can have negative consequences on air quality. Smoke and other byproducts of grilling can contaminate the indoor air, leading to unpleasant odors and potential health issues. The accumulation of smoke particles can also leave stains and residue on walls, ceilings, and other surfaces, requiring extensive cleaning and maintenance.

To ensure safe grilling practices, it is advisable to use a grill in designated outdoor areas, such as a backyard, patio, or balcony. These areas provide better ventilation and minimize the risks associated with grilling indoors. If using a propane or charcoal grill, always follow the manufacturer’s instructions and safety guidelines.

If grilling indoors is absolutely necessary due to extreme weather conditions or limited outdoor space, consider investing in alternative grilling options specifically designed for indoor use. Electric grills or griddles are safer alternatives that do not emit harmful gases like carbon monoxide and generally have built-in safety features.

In conclusion, while it is technically possible to grill in a Garage Door Repair Bedford TX with the door open, it is not recommended due to safety concerns. The risks associated with carbon monoxide poisoning, fire hazards, and poor air quality outweigh the convenience of grilling indoors. Always prioritize safety and follow proper guidelines when using a grill to ensure a pleasant and hazard-free grilling experience.

Bedford Best Garage & Overhead Doors

2200 Airport Fwy Suite 555, Bedford, TX 76022

817-373-5968

Why is it Significant To Correct Garage Door Panels?    

Garage Door Repair Bedford TX

Garage Door Panel Repair

It is important to repair any damage or dents to your garage door as soon as possible. Even if it’s minor, cosmetic damage, it can affect the curb appeal of your property. To ensure that your garage door looks great, you need to have them repaired quickly.

It is important to not ignore the damage that has occurred. This could cause more damage to your garage door’s structure. A large dent can cause bends in the tracks of your garage door, which could lead to it being difficult or impossible to use. You’ll quickly discover that the repairs you delay are more costly and time-consuming if you think they’re too expensive.

It is important to address the problem immediately. It is easier and cheaper to fix it the sooner you do. Our Experts at Garage Door Repair Bedford TX will help you. after you read this blog.

Can Garage Door Panels Be Repaired?

If the garage panel is damaged, it can be repaired. There are several ways to fix the problem depending on how severe the damage is.

You can hammer a small dent in one of the panels if you find it. You can use a tool and a 2×4 to do this, or you can use aluminum foil compressed with an igniter to “pop the metal back into its proper place.” This will usually repair any small dents on the garage door.

If the damage is more extensive or multiple panels are damaged, it’s time to replace them. You can repair the damage and keep the garage door as it is and save money on a replacement. You can repair it much easier than you might think. Also, you will save money by only replacing one or two panels.

Why Replace Instead of a Repair?

It may be more cost-effective to repair the panels than to replace the whole door in certain circumstances. If you have severe damage and need to replace the whole garage door, do so. This is when you should think about replacing the garage door.

Take into account the Age of the Door

Garage doors can be affected by their condition. Garage doors of any type have a life expectancy of approximately 2-4 years depending on their style and material.

You should consider the condition of your garage door’s doors if you see damage to their panels. The panels will not be worth repairing if they are past their useful life expectancy. The doors will need to be replaced within a few years. It’s better to upgrade the door in the interim.

Take into consideration the damage to the panels

Your garage door’s damage will also play a significant role. It is a good idea to replace damaged panels and keep the garage door open if there are no other damages.

If a lot of panels have been damaged or extensive damage has occurred, you might want to replace the whole door. You can get help from a professional garage door installer.

Take a Look at Other Issues

You might have damage to the garage door panels. However, you should also look at other problems your garage door may be experiencing in the future. Do you notice that your garage door is sliding? This could indicate that the wood is buckling or breaking. This could lead to more damage down the line. You might also notice cracks in the wood or the door not functioning as it should. You should consider replacing the door rather than fixing it. It will save you more money in the long term.

Everything You Need to Know About Garage Door Panel Repair

After you have inspected your garage door and decided that repair is more efficient than replacement, it’s time to know what next. Consider matching the garage doors’ color. A new panel can be purchased that matches your garage door’s color. Your door’s appearance may have been damaged by the elements and the sun over time. You might consider repainting your doors after replacing the panel to ensure it looks their best.

Take into account the number of panels you need to replace. It is a good idea for your garage door to be in working order. You may need to replace the entire door if the problem is severe. This is especially true if your panel has caused more damage to the door.

You will need to find a trustworthy contractor to install the components for you. You can do it yourself but it is not easy and may be dangerous. You might not be able to do the job right because you lack the experience and knowledge of a professional garage door repair technician. It will appear that the damage was not done by a professional.

Garage door panels are easier than you might think. They can be removed and replaced as needed. You can repair damaged doors and return them in perfect working order.

Powered by WordPress & Theme by Anders Norén