Local Businesses Blog in Texas

Cleveland Texas

Tag: garage door repair Grapevine TX Page 1 of 2

How To Open A Garage Door When The Spring Breaks – Grapevine Garage Door & Gates


However, it’s essential to stay calm and take appropriate steps to open the garage door safely. In this guide, I’ll walk you through the process of opening a Garage Door Repair Grapevine TX when the spring breaks, ensuring safety for yourself and your property.

Step 1: Understand the Risks

  1. Avoid Using the Garage Door Opener: If the spring is broken, attempting to operate the garage door opener can cause further damage and pose safety risks.
  2. Beware of Tension: Broken garage door springs can release stored tension, causing the door to fall suddenly. Exercise caution and keep clear of the door’s path.

Step 2: Gather Necessary Tools

  1. Ladder: Use a sturdy ladder to access the emergency release mechanism or manually lift the garage door.
  2. Locking Pliers or Vice Grips: These can help secure the garage door in place once it’s open to prevent it from falling unexpectedly.

Step 3: Locate the Emergency Release Cord

  1. Find the Cord: The emergency release cord is typically located near the top of the garage door opener motor unit, hanging down from the track or trolley mechanism.
  2. Identify the Red Handle: The emergency release cord usually has a red handle or tag for easy identification.

Step 4: Pull the Emergency Release Cord

  1. Pull Downward: Grasp the emergency release cord firmly and pull it downward in the direction of the garage door. This action disengages the garage door opener from the door itself.
  2. Verify Disengagement: Once the emergency release cord is pulled, you should be able to manually lift the garage door with minimal resistance.

Step 5: Lift the Garage Door Manually

  1. Use Caution: Approach the garage door cautiously and with care. It may be heavy, especially if it’s a double-car garage door.
  2. Lift from the Bottom: Place your hands near the bottom of the garage door and lift it upward slowly and steadily. Be prepared to support its weight.

Step 6: Secure the Garage Door

  1. Use Locking Pliers or Vice Grips: Once the garage door is fully open, clamp locking pliers or vice grips onto the track just below the bottom roller to hold the door in place.
  2. Prevent Accidental Closing: This step is crucial to prevent the garage door from accidentally closing while you’re working underneath it.

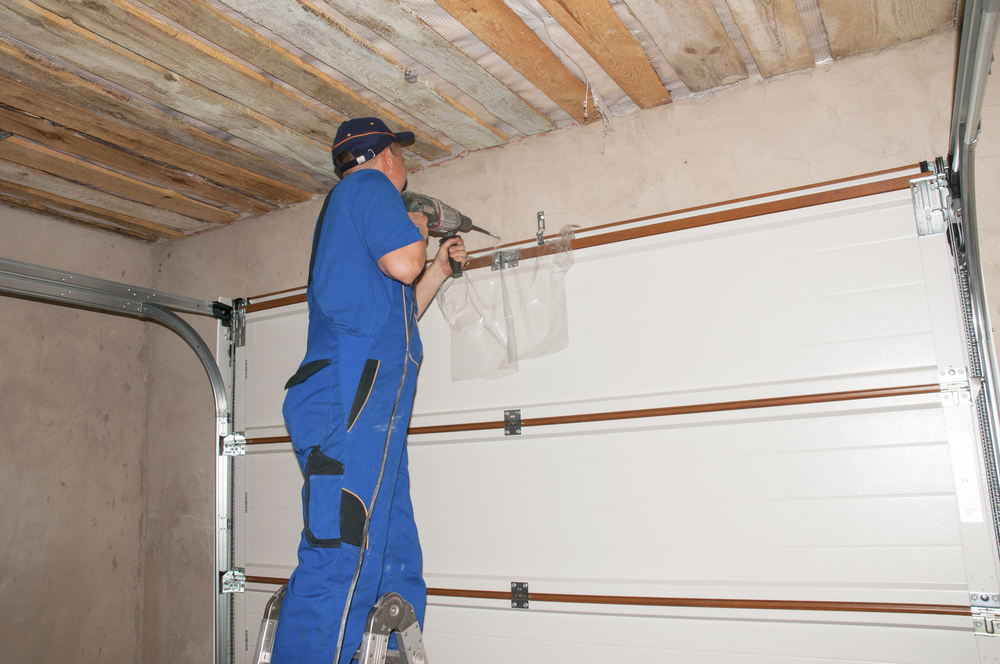
Step 7: Seek Professional Repair

  1. Contact a Garage Door Technician: Broken garage door springs should be replaced by a qualified technician. Attempting to repair or replace the springs yourself can be dangerous.
  2. Schedule Prompt Repair: Arrange for a professional repair service as soon as possible to restore the functionality and safety of your garage door.

Step 8: Exercise Caution

  1. Keep Clear of Moving Parts: Avoid placing your hands or body near moving parts of the garage door, such as the springs, cables, or rollers.
  2. Stay Aware: Be mindful of your surroundings and potential hazards throughout the process of opening the garage door manually.

Step 9: Test the Door

  1. Operate Manually: After securing the garage door in the open position, test its manual operation by lifting and lowering it a few times to ensure smooth movement.
  2. Ensure Proper Function: The garage door should move freely and without resistance. If you encounter any issues, refrain from using the door until repairs are completed.

Conclusion:

Remember to prioritize safety at all times and seek the assistance of a qualified technician for spring replacement and Garage Door Repair Grapevine TX

Grapevine Garage Door & Gates

1-817-809-2507

https://maps.app.goo.gl/UmAbXjG5jFSa7YQp9

How To Replace Vinyl Trim Around Garage Door – Grapevine Garage Door & Gates


RGarage Door Repair Grapevine TX Is a manageable project that can enhance the appearance and functionality of your garage.

Here’s a detailed guide with step-by-step instructions to help you replace vinyl trim effectively:

Step 1: Gather Necessary Tools and Materials Before you start, gather all the tools and materials you’ll need for the job. This typically includes:

  • New vinyl trim pieces
  • Tape measure
  • Utility knife or vinyl siding removal tool
  • Hammer
  • Pry bar
  • Nail gun or screws and drill
  • Caulk gun
  • Exterior-grade silicone caulk
  • Safety glasses
  • Work gloves
  • Ladder

Step 2: Measure and Purchase Replacement Trim Start by measuring the dimensions of the existing vinyl trim around your garage door. Note down the length and width of each trim piece that needs to be replaced. Take these measurements to a home improvement store to purchase replacement vinyl trim pieces of the appropriate size and style.

Step 3: Remove the Old Trim Using a utility knife or vinyl siding removal tool, carefully cut through the caulking or adhesive sealant that holds the old trim in place. Start at one end of the trim and work your way along its length, taking care not to damage the surrounding surfaces.

Once the caulking is cut, use a pry bar or hammer to gently loosen and remove the old trim pieces from around the garage door. Be cautious not to damage the door or surrounding structure during this process.

Step 4: Clean the Area After removing the old trim, use a brush or vacuum cleaner to remove any dirt, debris, or old caulking from the surface around the garage door. Ensure the area is clean and free of obstructions to provide a smooth surface for installing the new trim.

Step 5: Install the New Trim Start by positioning the first piece of replacement vinyl trim along one side of the garage door opening. Use a tape measure to ensure it is aligned properly and level. Secure the trim in place using a nail gun or screws and drill, making sure to leave space for expansion and contraction.

Continue installing the replacement trim pieces around the perimeter of the garage door, working your way around the opening in the same manner. Use a level to ensure each piece is installed straight and flush against the surface.

Step 6: Caulk the Joints Once all the replacement trim pieces are installed, use a caulk gun to apply a bead of exterior-grade silicone caulk along the joints where the trim meets the garage door frame and siding. This will help seal out moisture and provide a finished appearance.

Smooth the caulk with your finger or a caulk finishing tool to ensure it forms a tight seal and blends seamlessly with the surrounding surfaces. Wipe away any excess caulk with a damp cloth or sponge.

Step 7: Allow the Caulk to Cure Allow the silicone caulk to cure according to the manufacturer’s instructions before exposing it to moisture or harsh weather conditions. This typically takes 24 to 48 hours, but follow the specific recommendations on the caulk packaging for best results.

Step 8: Clean Up Dispose of any old trim pieces and clean up your work area, removing any debris or waste materials. Store your tools and equipment properly for future use.

Step 9: Inspect and Test Once the caulk is fully cured, inspect the newly installed vinyl trim around the garage door to ensure it is securely in place and properly sealed. Test the operation of the garage door to ensure it opens and closes smoothly without any obstructions.

Garage Door Repair Grapevine TX you can successfully replace vinyl trim around your garage door and improve the appearance and functionality of your garage. Always prioritize safety and attention to detail throughout the process, and don’t hesitate to seek professional assistance if needed.

Grapevine Garage Door & Gates

Grapevine Doors and Gates
2958 Wentwood Dr.
Grapevine, TX 76051

1-817-809-2507

How Much Does Garage Door Repair Cost – Grapevine Gates & Garage Doors

Grapevine Garage Door Repair can vary widely in cost depending on the nature and extent of the issues.

Factors such as the type of garage door, the specific components that need fixing or replacing, and the labor involved all contribute to the overall expense.

Firstly, let’s consider the different components that might require repair. Common issues include problems with the springs, cables, rollers, tracks, and the garage door opener. Each of these elements plays a crucial role in the smooth functioning of the garage door, and if any of them malfunctions, it can affect the entire system.

The cost of garage door repairs can range from as low as $100 for minor fixes to several hundred or even over a thousand dollars for more extensive repairs. Here’s a breakdown of potential costs:

  1. Springs: Garage door spring replacement is a common repair. The cost can range from $50 to $300 per spring, depending on whether you have torsion or extension springs.
  2. Cables: If the cables are frayed or broken, they typically cost around $150 to $200 to replace.
  3. Rollers: Faulty rollers might cost $10 to $20 each to replace, and if the entire set needs replacement, it could be around $100.
  4. Tracks: Repairing or replacing garage door tracks may cost $100 to $200, depending on the complexity of the job.
  5. Opener Repair: If the garage door opener is malfunctioning, repair costs can range from $100 to $300, and a complete replacement might be $200 to $600 or more.
  6. Labor Costs: Labor costs vary by location and the complexity of the repair. On average, you might expect to pay $50 to $100 per hour for garage door repair labor.

It’s important to note that these are rough estimates, and actual costs can vary based on factors like the local market, the specific model of your garage door, and the availability of replacement parts. Additionally, emergency or off-hours repairs may incur higher labor costs.

In some cases, it might be more cost-effective to replace an older or extensively damaged garage door rather than investing in multiple repairs. A new garage door installation can range from $500 to $2000 or more, depending on the type and material of the door.

To get an accurate estimate for your specific situation, it’s recommended to contact local Grapevine Garage Door Repair professionals for a thorough inspection and quote. Regular maintenance of your garage door can also help prevent costly repairs in the long run.

Grapevine Gates & Garage Doors

601 W Wall St, Grapevine, TX 76051

817-790-9634

How To Remove Dent From Metal Garage Door – Grapevine Gates & Garage Doors

Removing a dent from a metal Garage Door Repair Grapevine TX is a task that might seem daunting at first, but with the right tools and techniques, it’s a repair you can tackle on your own.

Here’s a detailed guide to help you through the process, step by step.

Begin by thoroughly inspecting the dent. Note its size, depth, and the general condition of the surrounding area. This initial assessment will guide you in choosing the most appropriate method for repair.

2. Gather Necessary Tools: To effectively remove the dent, gather the following tools:

  • Rubber mallet
  • Wooden block
  • Heat gun or hairdryer
  • Compressed air or air duster
  • Boiling water
  • Dry ice (optional)
  • Plunger (for smaller dents)

3. Apply Heat: Using a heat gun or hairdryer, heat the dented area. Keep the heat source a few inches away and move it around to ensure even heating. The goal is to make the metal more malleable for reshaping.

4. Use Compressed Air: After heating the metal, quickly turn a can of compressed air upside down or use an air duster to spray the affected area. The rapid cooling caused by the compressed air will encourage the metal to contract, potentially popping the dent back into place.

5. Boiling Water Method: For larger dents, boil a pot of water and pour it over the dent. Simultaneously, reach behind the door and carefully push the dent out from the inside while the metal is still warm. Be cautious and wear protective gloves to shield your hands from hot water.

6. Optional Dry Ice Method: If you have access to dry ice, use gloves to press a piece of it against the dent. The extreme cold can expedite metal contraction, aiding in dent removal.

7. Rubber Mallet and Wooden Block: If the dent persists, position a wooden block against the outer side of the dent and gently tap it with a rubber mallet. Gradual and measured taps will help reshape the metal without causing additional damage.

8. Plunger Method: For smaller dents, a plunger can be surprisingly effective. Moisten the plunger and place it over the dent. Create suction by pushing and pulling the plunger, which may pull the dent outward.

9. Finish with Paintless Dent Repair: Once the dent is removed, consider using paintless dent repair techniques for a professional finish. PDR tools such as dent pullers and rods can assist in achieving a seamless result.

10. Repaint if Necessary: If the paint is scratched or damaged during the dent removal process, you may need to repaint the affected area. Use a primer and paint that match the original color of your garage door.

Conclusion:

Successfully removing a dent from a metal Garage Door Repair Grapevine TX involves a combination of heat, cold, and careful manipulation. With the right tools and a patient approach, you can restore your garage door to its former condition. Always work methodically to avoid causing unintended damage, and consider seeking professional assistance if needed.

Grapevine Gates & Garage Doors

817-631-6355

How To Install Garage Door – Grapevine’s Maid Pros

Sure thing! Installing a Garage Door Repair Grapevine TX involves several steps to ensure it functions properly and safely. Here’s a detailed guide with approximately 1000 words:


Title: A Comprehensive Guide to Installing Your Garage Door

A well-installed garage door not only enhances the aesthetics of your home but also ensures the safety and security of your belongings. Follow these step-by-step instructions to successfully install your garage door.

Step 1: Gather Necessary Tools and Materials

Before you begin the installation process, make sure you have all the required tools and materials. This typically includes a power drill, screwdriver, wrenches, level, tape measure, and the garage door kit, which should include the door panels, tracks, rollers, springs, and other essential components.

Step 2: Measure and Prepare the Opening

Measure the width and height of your garage door opening to determine the size of the door you need. Ensure that the opening is square and level. If not, adjustments may be needed, such as shimming the jambs.

Step 3: Install the Door Tracks

Attach the vertical and horizontal tracks to the opening according to the manufacturer’s instructions. Use a level to ensure that the tracks are plumb and aligned properly. Secure them in place with the provided hardware.

Step 4: Install the Rollers

Attach the rollers to the sections of the garage door. These will help the door move smoothly along the tracks. Make sure the rollers are securely in place and rotate freely.

Step 5: Install the Torsion Springs

Torsion springs are crucial for counterbalancing the weight of the garage door. Follow the manufacturer’s guidelines to install the torsion springs securely. Exercise caution, as these springs are under tension and can be dangerous if mishandled.

Step 6: Attach the Panels

Carefully lift each garage door panel into place, connecting them with the provided hinges. Ensure that the panels are level and that there is an even gap between them. Secure the hinges and panels according to the manufacturer’s instructions.

Step 7: Install the Bottom Seal

Attach the bottom seal to the bottom of the garage door to prevent drafts, debris, and pests from entering. Trim the seal to fit the width of the door and secure it in place with the provided adhesive or screws.

Step 8: Install the Weatherstripping

Apply weatherstripping along the sides and top of the garage door to create a tight seal and improve energy efficiency. Trim the weatherstripping as needed and use adhesive to secure it in place.

Step 9: Install the Operator System

If your garage door is motorized, follow the manufacturer’s instructions to install the operator system. This typically involves mounting the motor, connecting it to the door, and programming any necessary remotes or keypads.

Step 10: Test the Door

Once everything is installed, test the garage door’s operation. Check for smooth movement along the tracks, ensure that it opens and closes completely, and listen for any unusual noises. Make any necessary adjustments to ensure proper functionality.

Step 11: Final Checks and Adjustments

Inspect all components to ensure they are securely in place. Tighten any loose screws or bolts, and lubricate moving parts such as rollers and hinges. Perform a final test to confirm that the garage door operates smoothly and safely.

Conclusion

By following these detailed steps, you can successfully install a Garage Door Repair Grapevine TX that enhances your home’s functionality and curb appeal. Remember to prioritize safety throughout the process and consult the manufacturer’s instructions for specific guidance on your garage door model.

Grapevine’s Maid Pros

1527 W State Hwy 114, Grapevine, TX 76051, United States

1-817-442-2239

How To Break Garage Door Rust – Grapevine Gates & Garage Doors

Sure, let’s tackle this rust issue. Breaking  Garage Door Repair Grapevine TX rust is crucial not just for aesthetic reasons, but also for the functionality and longevity of your garage door. Here’s a detailed guide on how to tackle this problem:

Understanding Rust:

Before diving into solutions, it’s essential to understand what rust is and how it forms. Rust, or iron oxide, occurs when iron reacts with oxygen and moisture. Your garage door, being exposed to the elements, is susceptible to this process.

Materials You’ll Need:

  1. Safety Gear:
    • Gloves
    • Safety glasses
  2. Cleaning Supplies:
    • Wire brush
    • Sandpaper (coarse and fine grit)
    • Rust dissolver/convertor
    • Mild detergent
    • Water
  3. Protective Coatings:
    • Rust-inhibiting primer
    • Rust-resistant paint
  4. Lubricant:
    • Silicone-based lubricant

Step-by-Step Guide:

1. Safety First:

  • Put on your safety gear to protect yourself from any rust particles or chemicals.

2. Cleaning the Surface:

  • Use a wire brush to remove loose rust. Brush in the direction of the grain to avoid causing additional damage.
  • For stubborn rust, use coarse-grit sandpaper to smooth the surface.

3. Rust Dissolver/Converter:

  • Apply a rust dissolver or converter according to the product instructions. This chemical will neutralize the rust and prevent further corrosion.
  • Let it sit for the recommended time.

4. Cleaning Again:

  • After the rust dissolver has done its job, clean the surface with a mild detergent and water. This removes any residue from the dissolver.

5. Sanding for Smoothness:

  • Use fine-grit sandpaper to create a smooth surface. This is crucial for the primer and paint to adhere properly.

6. Applying Rust-Inhibiting Primer:

  • Apply a rust-inhibiting primer to the clean, smooth surface. This creates a protective barrier between the metal and the external environment.
  • Follow the primer manufacturer’s instructions for drying time.

7. Painting for Protection:

  • Once the primer is dry, apply rust-resistant paint. Choose a color that complements your garage and provides an extra layer of protection.
  • Multiple thin coats are better than one thick coat. Allow each coat to dry before applying the next.

8. Regular Maintenance:

  • To prevent future rusting, inspect your garage door regularly.
  • Keep the door clean and free from debris.
  • Apply a silicone-based lubricant to hinges, springs, and other moving parts to prevent friction and rust.

9. Professional Help:

  • If the rust issue is severe or if you’re uncomfortable with a DIY approach, consider hiring a professional garage door repair service.

Conclusion:

Breaking  Garage Door Repair Grapevine TX rust is a process that requires time and attention to detail. By following these steps, you not only address the current rust problem but also take preventive measures for the future. Regular maintenance is key to ensuring your garage door stays rust-free and functions smoothly for years to come.

Grapevine Gates & Garage Doors

817-631-6355

How To Install Genie Garage Door Sensors – Grapevine’s Best Garage Doors

Installing Genie Garage Door Repair Grapevine TX is a relatively straightforward process that ensures the safety and proper functioning of your garage door opener.

These sensors, also known as photoelectric sensors or safety sensors, prevent the door from closing if an obstruction is detected in the door’s path. Below, I’ll provide you with a step-by-step guide on how to install Genie garage door sensors in approximately.

Before you start, please make sure to follow safety precautions:

  1. Read the Manual: Always start by reading the installation manual provided by Genie for your specific garage door opener model. This guide provides crucial information on sensor placement and wiring.
  2. Turn off Power: For safety, disconnect the power supply to the garage door opener. You can usually do this by unplugging it or turning off the circuit breaker that powers the opener.
  3. Gather Tools and Materials:
    • Genie garage door sensor kit (typically includes two sensors, wires, and mounting hardware)
    • A ladder
    • A screwdriver
    • Wire stripper/cutter
    • Wire nuts or connectors
    • Drill and drill bits (if necessary)
    • Level
    • Zip ties (optional)

: Identify the Sensors’ Location:

  • The Genie garage door sensors come in pairs: one sending unit (with a red indicator light) and one receiving unit (with a green indicator light). The sending unit emits an infrared beam to the receiving unit, creating an invisible beam across the door opening.
  • These sensors should be mounted on the wall on either side of the garage door, about 6 inches above the floor and aligned with each other.

: Mount the Sensors:

  1. Choose a Side: Start by selecting one side of the garage door to install the sending unit. This is usually the side where the wires from the opener motor come out.
  2. Mark the Mounting Holes: Use a pencil or marker to mark the spots where you will drill holes for mounting the sending unit. Make sure it’s level and about 6 inches above the floor.
  3. Drill Holes (if necessary): Depending on your garage’s construction, you may need to drill holes for the sensor brackets. Use a drill bit that matches the size of the included anchors if needed.
  4. Attach the Sending Unit: Securely attach the sending unit to the wall using the provided mounting brackets and screws. Ensure it’s level and aligned with the marked spots.
  5. Repeat for the Receiving Unit: Once the sending unit is installed, align and mount the receiving unit on the opposite side in the same manner.

: Wiring the Sensors:

  1. Run Wires: Run the sensor wires from each sensor unit to the garage door opener motor. Keep the wires neat and out of the way of the garage door’s moving parts.
  2. Strip Wires: Strip about 1/2 inch of insulation from the ends of the sensor wires using a wire stripper.
  3. Connect the Sending Unit: Connect the wires from the sending unit to the corresponding terminals on the back of the garage door opener motor. Typically, these terminals are labeled as “S” and “S” for the sending unit and “R” and “R” for the receiving unit. Use wire nuts or connectors to secure the connections, and ensure they are tight.
  4. Connect the Receiving Unit: Repeat the same process for the wires from the receiving unit, connecting them to the “R” and “R” terminals on the opener motor.
  5. Secure Excess Wiring: Use zip ties or clips to secure any excess wiring to prevent it from hanging loosely.

: Align the Sensors:

  1. Ensure that both sensors are securely attached to the wall and level with each other.
  2. Make sure the sensors are facing each other, and the lenses are clean and unobstructed.
  3. Adjust the sensors’ alignment if necessary to make sure the infrared beam is unbroken. This usually involves tilting or repositioning one or both sensors until the indicator lights on both units are lit and steady.

: Test the Sensors:

  1. Reconnect the power to the garage door opener.
  2. Press the garage door opener remote or wall button to close the door.
  3. As the door is closing, place an object (e.g., a broomstick) in the path of the closing door to block the infrared beam.
  4. The door should stop and reverse its movement as soon as the beam is blocked. If it doesn’t, immediately disconnect the power to the opener and recheck the sensor alignment and wiring.
  5. Once the sensors are working correctly, remove the obstruction, and the door should operate smoothly.

: Final Checks:

  1. Confirm that the door opens and closes smoothly without any issues.
  2. Periodically clean the sensor lenses to ensure they function correctly.
  3. If you encounter any problems or the sensors fail to align, refer to the Genie garage door opener manual for troubleshooting guidance.

Congratulations! You’ve successfully installed Genie Garage Door Repair Grapevine TX. Properly installed and aligned sensors are crucial for the safe operation of your garage door. Always perform regular maintenance checks to ensure they continue to work correctly.

Grapevine’s Best Garage Doors

820 Kings Canyon Dr, Grapevine, TX 76051, United States

1-817-790-9634

How Much Does it Cost to Replace a Garage Door-Grapevine Gates & Garage Doors


Replacing a Garage Door Repair Grapevine,TX involves several factors that can influence the cost, making it essential to consider various aspects when determining the overall expense.

Garage door replacement costs can vary widely based on factors like the type of door, materials, labor, location, and any additional features or customization. In this essay, we will explore these factors in detail to help you understand the cost implications of replacing a garage door.

1. Type of Garage Door:

The type of garage door you choose is a significant factor in determining the cost. Common types include:

  • Single Panel Garage Door: These are often the most affordable option but may have limited design choices and less insulation.
  • Sectional Garage Door: Sectional doors are popular for their durability and insulation properties, but they are typically more expensive than single-panel doors.
  • Roll-Up Garage Door: Roll-up doors are commonly used in commercial settings but can be found in residential applications. They tend to be more expensive than sectional doors due to their robust construction.

2. Materials:

The material of the garage door greatly affects the cost. Common materials include:

  • Steel: Steel doors are durable, low-maintenance, and relatively affordable. Prices can vary based on the gauge (thickness) of the steel and any insulation added.
  • Wood: Wooden garage doors offer a classic and elegant look but tend to be more expensive than steel doors. They may require more maintenance to prevent warping and rot.
  • Aluminum: Aluminum doors are lightweight and resistant to rust. They are generally less expensive than wood but more expensive than basic steel doors.
  • Fiberglass: Fiberglass doors are lightweight and require minimal maintenance, but they can be on the pricier side.

3. Insulation:

The level of insulation in a garage door impacts both its price and its energy efficiency. Garage door insulation is measured by R-value, with higher values indicating better insulation. Insulated doors are more expensive than non-insulated ones, but they can help regulate temperatures in your garage and reduce heating/cooling costs.

4. Size and Style:

The size and style of the garage door also influence the cost. Larger doors naturally cost more than smaller ones. Additionally, custom designs, decorative elements, and unique finishes can increase the overall expense.

5. Labor Costs:

The labor costs for garage door replacement include the removal of the old door and the installation of the new one. Labor rates can vary by location and the complexity of the job. Hiring a professional installer ensures that the door is correctly installed and functions smoothly.

6. Additional Features:

There are various optional features that can add to the cost of a garage door replacement:

  • Windows: Adding windows to your garage door can enhance its aesthetics but also increase the price.
  • Automatic Opener: If you don’t already have a garage door opener, you’ll need to factor in the cost of purchasing and installing one.
  • Security Features: Upgrading to a more secure locking mechanism or smart garage door opener can also increase costs.
  • Paint or Stain: Finishing options such as paint or stain can add to the overall cost but can significantly impact the door’s appearance.

7. Location and Climate:

The geographic location of your home can influence the cost of garage door replacement. Areas with extreme weather conditions may require doors with higher insulation values, impacting the overall cost.

8. Brand and Quality:

The brand and quality of the garage door and its components can also affect the price. Established brands with a reputation for durability and reliability may come with a higher price tag.

9. Permits and Regulations:

Some localities may require permits for garage door replacement. Be sure to check with your local authorities to understand any additional costs associated with permitting and compliance with building codes.

10. Warranty:

A warranty on your new garage door can provide peace of mind and potentially save you money on repairs in the future. The cost of a door may be higher if it comes with an extended warranty.

Conclusion:

In conclusion, the cost of replacing a Garage Door Repair Grapevine,TX can vary significantly based on a multitude of factors. It’s essential to carefully consider your needs and budget when selecting the type, material, insulation, size, and style of your new garage door. Additionally, labor costs, location, additional features, and the quality of the door and its components all contribute to the final price. To get an accurate estimate, it’s advisable to consult with a reputable garage door installer who can assess your specific requirements and provide you with a detailed quote. Ultimately, investing in a high-quality garage door replacement can enhance the curb appeal, security, and energy efficiency of your home, making it a valuable long-term investment.

Grapevine Gates & Garage Doors

601 W Wall St, Grapevine, TX 76051, United States

1-817-631-6355

How To Relock A Garage Door – Grapevine Gates & Garage Doors

Relocking a Garage Door Repair Grapevine TX manually after it has been opened manually or due to a power outage is an important step to ensure the security of your property. While most modern garage doors automatically lock when fully closed, you may need to manually re-engage the locking mechanism if the door has been operated manually.

Here’s a comprehensive guide on how to relock a garage door:

Step 1: Safety Precautions

  1. Ensure Safety: Before attempting to relock the garage door, make sure there are no obstructions in the door’s path and that it is fully closed.

Step 2: Identify the Locking Mechanism

  1. Understand Your Garage Door Lock: Different garage doors have varying locking mechanisms. Some doors have automatic locking systems that engage when the door is fully closed, while others have manual lock bars or mechanisms that need to be engaged manually.

Step 3: Manual Lock Bars

  1. Locate the Lock Bars: If your garage door has manual lock bars, they are usually located on the inside of the door near the bottom. These bars slide into holes in the tracks to secure the door.
  2. Slide Lock Bars into Place: To relock the garage door, insert the lock bars into the corresponding holes in the tracks. This prevents the door from being lifted manually.

Step 4: Automatic Locking Mechanism

  1. Check for Automatic Locking: Some garage doors have an automatic locking mechanism that engages when the door is fully closed. This is typically activated by the door’s track engaging with a locking mechanism located on the inside of the door.
  2. Test the Locking Mechanism: Close the door fully and try to lift it manually. If the door resists lifting and feels securely locked, the automatic locking mechanism is likely engaged.

Step 5: Test the Locking

  1. Attempt to Lift the Door: After manually engaging the lock bars or ensuring that the automatic locking mechanism is engaged, attempt to lift the door manually from the outside. The door should not lift, indicating that it is securely locked.

Step 6: Unlocking the Door

  1. Unlock Before Operating: Before attempting to operate the garage door using the opener, make sure to unlock it. If your garage door has an automatic opener, it will not be able to lift the door if the manual lock bars are engaged.

Step 7: Regular Maintenance

  1. Maintain the Locking Mechanism: Periodically check the locking mechanism and lock bars for any signs of wear or damage. Lubricate the lock bars and their holes to ensure smooth operation.
  2. Lubricate Moving Parts: Regularly lubricate the moving parts of your garage door, including hinges, rollers, and tracks, to prevent rust and ensure proper operation.

Step 8: Considerations

  1. Security Measures: While manual lock bars provide an additional layer of security, remember that automatic garage door openers also have their own safety and security features. Ensure that your garage door opener’s security settings are activated and that your remote control codes are secure.
  2. Power Outages: In the event of a power outage, the automatic locking mechanism may not engage. Make sure to manually engage the lock bars during power outages to secure your garage door.

In conclusion, relocking a Garage Door Repair Grapevine TX involves engaging the manual lock bars or confirming that the automatic locking mechanism is engaged. By following these steps and performing regular maintenance, you can ensure that your garage door is securely locked and provides the necessary security for your property. Always prioritize safety and proper maintenance to keep your garage door functioning smoothly and securely.

Grapevine Gates & Garage Doors

601 W Wall St, Grapevine, TX 76051, United States

1-817-631-6355

How to Replace Garage Door Bottom Seal-Grapevine Garage Door & Gates

Replacing the bottom seal on a Garage Door Repair Grapevine TX is a relatively simple task that can be done by following a few steps.

This guide will walk you through the process in detail. Please note that the specific steps may vary depending on the type and model of your garage door, so it’s important to consult your manufacturer’s instructions if available.

Before you begin, gather the necessary tools and materials:

  • New bottom seal
  • Measuring tape
  • Utility knife
  • Pliers
  • Screwdriver (flathead or Phillips, depending on your garage door)
  • Hammer
  • Nails or screws (if required)
  • Lubricant (silicone spray or similar)

Now, let’s get started:

Step 1: Measure the existing seal Use a measuring tape to determine the length of the old bottom seal. This measurement will help you ensure that the replacement seal is the correct size.

Step 2: Remove the old seal Start by opening the garage door fully. Locate the bottom seal, which is usually attached to a retainer or track at the bottom of the door. Use pliers or a screwdriver to remove any nails, screws, or clips securing the old seal. Slowly pull the seal out of the track, taking care not to damage the door or the track.

Step 3: Clean the track Inspect the track for any debris, dirt, or old adhesive. Use a brush or a damp cloth to clean the track thoroughly. This will help the new seal fit properly and ensure a tight seal.

Step 4: Install the new seal Unroll the new bottom seal and position it at one end of the garage door. Slide it into the track, pushing it firmly to ensure a snug fit. Work your way along the track, carefully inserting the seal until you reach the other end. If necessary, trim any excess length using a utility knife.

Step 5: Secure the seal (if required) Depending on the type of garage door and seal, you may need to secure the new seal in place using nails or screws. Refer to your manufacturer’s instructions to determine if this step is necessary. If required, use a hammer to drive nails into the pre-drilled holes or a screwdriver to attach screws.

Step 6: Test the door Close the garage door and observe the new seal. Check for any gaps or areas where the seal is not properly aligned. Adjust the seal if necessary to ensure a tight and secure fit.

Step 7: Lubricate the seal and track To promote smooth operation and longevity of the seal, apply a silicone-based lubricant to the seal and the track. This will help reduce friction and prevent the seal from sticking to the track.

Congratulations! You have successfully replaced the bottom seal of your Garage Door Repair Grapevine TX. Regularly inspect and maintain the seal to ensure its effectiveness and replace it as needed to keep your garage well-insulated and protected from the elements.

Grapevine Garage Door & Gates

Grapevine Doors and Gates
Grapevine, TX

817-809-2507

Page 1 of 2

Powered by WordPress & Theme by Anders Norén