Local Businesses Blog in Texas

Cleveland Texas

Tag: garage door repair Page 3 of 41

How Difficult Is It To Replace A Garage Door Opener – Roadrunner Garage Doors

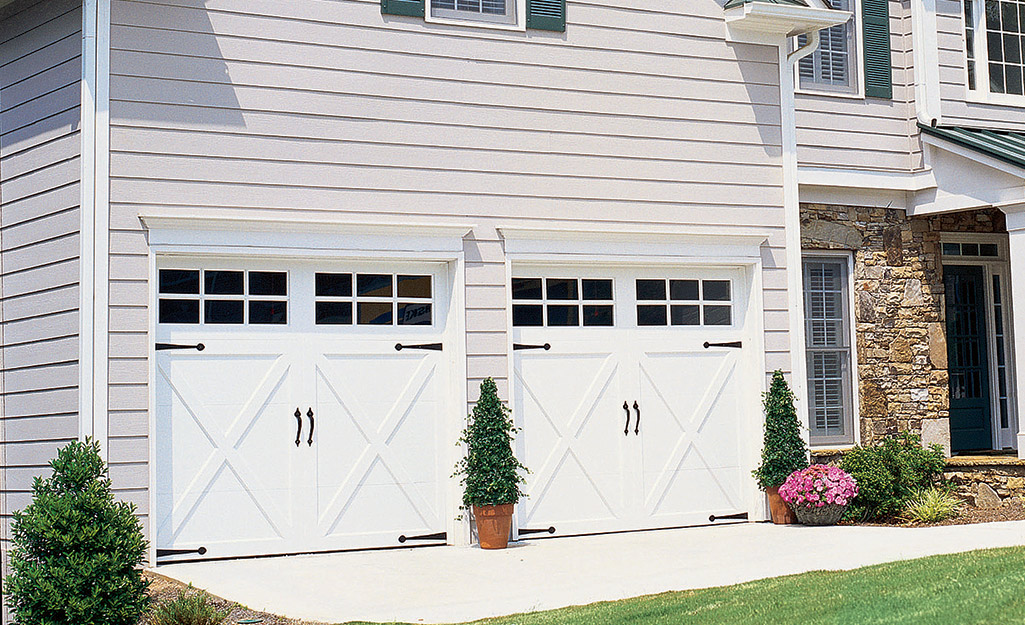
Garage Door Repair Fort Worth TX is a task that many homeowners may need to undertake at some point. Whether your existing opener is malfunctioning, outdated, or you simply want to upgrade to a newer model with advanced features, replacing a garage door opener can improve the security, convenience, and functionality of your garage.

While it may seem intimidating at first, especially if you’re not particularly handy, with the right tools, preparation, and guidance, it’s a manageable project that you can complete in a day or weekend.

1. Assess Your Needs

Before diving into the process of replacing your garage door opener, take some time to assess your needs and preferences. Consider factors such as the size and weight of your garage door, the type of drive system you prefer (chain, belt, or screw), and any additional features you may want, such as Wi-Fi connectivity, battery backup, or smartphone control. This will help you narrow down your options and choose the best garage door opener for your specific requirements.

2. Gather Tools and Materials

Once you’ve determined your needs and selected a new garage door opener, gather all the necessary tools and materials for the installation process. This typically includes:

  • New garage door opener kit
  • Screwdriver
  • Adjustable wrench
  • Pliers
  • Level
  • Tape measure
  • Drill and bits
  • Stepladder
  • Safety glasses
  • Helper (optional but recommended for some steps)

Having all the tools and materials on hand before you begin will help streamline the installation process and prevent delays.

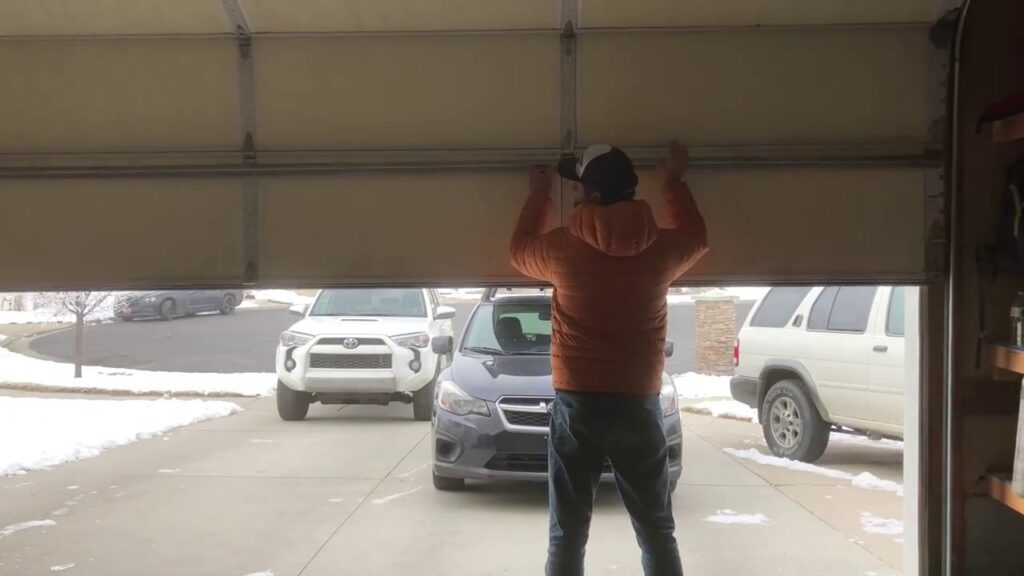
3. Prepare Your Garage

Before starting the installation, it’s essential to prepare your garage and workspace for the project. Clear out any clutter or obstacles around the garage door and ensure that there is enough space to work comfortably. If your garage has an automatic door opener already installed, disconnect it from the power source and remove any existing hardware or components that may interfere with the installation of the new opener.

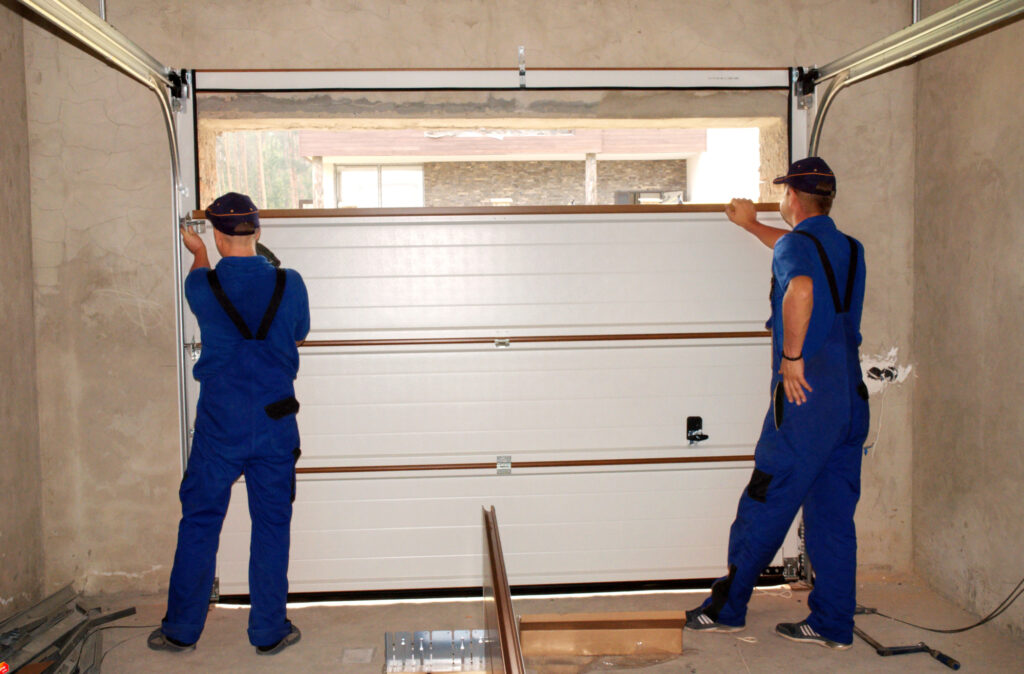
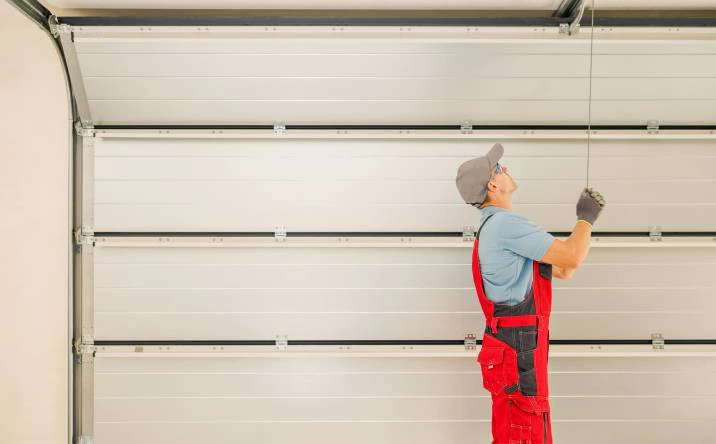
4. Install the New Opener

The installation process for a new garage door opener will vary depending on the specific model and manufacturer, so be sure to follow the manufacturer’s instructions carefully. In general, the installation process involves the following steps:

  • Mounting the opener to the ceiling or wall of the garage
  • Installing the rail and trolley assembly
  • Attaching the motor unit and drive system
  • Connecting the opener to the garage door and electrical system
  • Testing the opener to ensure proper operation

5. Test and Adjust

Once the new garage door opener is installed, it’s important to test it thoroughly to ensure that it’s functioning correctly. Test the opener using both the remote control and the wall-mounted keypad (if applicable) to open and close the garage door multiple times. Pay attention to any unusual noises, vibrations, or movements, as these may indicate an issue that needs to be addressed. Additionally, check the safety features of the opener, such as the auto-reverse mechanism, to ensure that they are functioning properly.

6. Troubleshoot and Fine-Tune

If you encounter any issues during the installation process or testing phase, don’t panic. Many common problems can be easily resolved with some troubleshooting and fine-tuning. Refer to the manufacturer’s instructions for troubleshooting tips and solutions to common problems, or consult online resources and forums for additional guidance. If you’re still having trouble, don’t hesitate to reach out to the manufacturer’s customer support team or seek assistance from a professional garage door technician.

Conclusion:

Replacing a garage door opener may seem like a challenging task, but with the right tools, knowledge, and preparation, it’s a manageable DIY project that many homeowners can tackle successfully. By assessing your needs, gathering the necessary tools and materials, preparing your garage, following the manufacturer’s instructions carefully, testing the opener thoroughly, and troubleshooting any issues that arise, you can replace your garage door opener with confidence and enjoy the convenience, security, and functionality of a new opener for years to come. If you’re unsure about any aspect of the installation process or encounter difficulties along the way, don’t hesitate to seek assistance from a professional garage door technician to ensure that the job is done safely and correctly.

Roadrunner Garage Doors

8616 4th Street, Frisco TX 75034

1-214-504-1822

How To Install Electrical Outlet For Garage Door Opener – Wallen Garage Door Repair and Installation

Garage Door Repair Hampton Roads VA require a reliable source of power to operate efficiently.

While many garage door openers come with a standard plug that can be connected to a nearby outlet, installing a dedicated electrical outlet specifically for the garage door opener can eliminate the need for extension cords and provide a more secure connection.

Assessing Electrical Needs

Before you begin the installation process, it’s essential to assess your electrical needs:

Understanding Power Requirements

Check the specifications of your garage door opener to determine its power requirements. Most garage door openers operate on standard household voltage, typically 120 volts.

Identifying Circuit Capacity

Determine if your existing electrical circuit has the capacity to support an additional outlet. Avoid overloading the circuit by ensuring it has sufficient capacity to handle the additional load of the garage door opener.

Gathering Necessary Tools and Materials

Before you start the installation process, gather the following tools and materials:

  • Electrical box
  • Outlet
  • Romex cable
  • Wire nuts
  • Electrical tape
  • Screwdriver
  • Wire stripper
  • Voltage tester
  • Drill and drill bits

Having these tools and materials on hand will make the installation process smoother and more efficient.

Safety Precautions

Safety should always be your top priority when working with electricity. Before you begin the installation process, take the following safety precautions:

Turning Off Power

Turn off power to the circuit you’ll be working on at the main electrical panel. Use a voltage tester to verify that the power is off before proceeding with the installation.

Using Protective Gear

Wear protective gear, such as safety glasses and gloves, to protect yourself from electrical hazards and sharp edges.

Step-by-Step Installation Process

Now that you’ve completed the necessary preparations, it’s time to install the electrical outlet for your garage door opener. Follow these steps:

Choosing Location

Choose a suitable location for the electrical outlet near the garage door opener. Ensure it’s easily accessible and within reach of the garage door opener’s power cord.

Installing Electrical Box

Mount the electrical box to the wall or ceiling near the chosen location. Use screws to secure the box in place, ensuring it’s level and flush with the surface.

Wiring the Outlet

Run a length of Romex cable from the nearest existing electrical outlet to the newly installed electrical box. Strip the insulation from the ends of the wires and connect them to the terminals on the outlet, following the manufacturer’s instructions. Secure the wires with wire nuts and electrical tape to ensure a secure connection.

Testing and Verification

Once the outlet is wired and installed, turn the power back on at the main electrical panel. Test the outlet with a voltage tester to verify that it’s receiving power. Plug in the garage door opener and test its operation to ensure the outlet is functioning properly.

Conclusion:

Installing an electrical outlet for your garage door opener is a relatively simple and straightforward process that can provide convenience and accessibility. By following the steps outlined in this guide and taking appropriate safety precautions, you can enjoy the benefits of a dedicated electrical outlet for your garage door opener.

Wallen Garage Door Repair and Installation

732 Bluecrab Rd Ste D, Newport News, VA 23606, United States

1-757-256-4543

How To Install Battery Backup On Genie Garage Door Opener –

Adding a battery backup to your Garage Door Repair Fort Worth TX is a smart investment that ensures you can still operate your garage door during power outages.

With a battery backup system in place, you won’t have to worry about being locked out of your garage or unable to leave during emergencies. In this comprehensive guide, we’ll walk you through the step-by-step process of installing a battery backup on your Genie garage door opener to ensure uninterrupted access to your garage.

Tools and Materials Needed

Before you begin the installation process, gather the following tools and materials:

  1. Battery backup kit compatible with your Genie garage door opener
  2. Power drill
  3. Screwdriver set
  4. Measuring tape
  5. Level
  6. Step ladder
  7. Safety goggles
  8. Pencil
  9. Mounting hardware (included with the battery backup kit)
  10. Battery pack (included with the battery backup kit)

Step-by-Step Installation Process

1. Preparation

Before you start the installation, read the manufacturer’s instructions provided with the battery backup kit to familiarize yourself with the process and ensure you have all the necessary tools and materials. Make sure the power to the garage door opener is turned off before you begin.

2. Locate the Power Source

Identify the power source for your Genie garage door opener. This is typically a power outlet located near the opener unit or the ceiling of the garage. Locate the outlet and determine if it’s suitable for powering the battery backup system.

3. Mount the Battery Backup Unit

If you’re adding a battery backup to an existing Genie garage door opener, mount the battery backup unit in a suitable location near the opener unit. Choose a spot that is easily accessible but out of the way of moving parts. Use the provided mounting hardware to secure the unit in place.

4. Connect the Battery Backup Unit

Follow the manufacturer’s instructions to connect the battery backup unit to the power source and the garage door opener. This typically involves plugging the unit into the power outlet and connecting it to the opener’s wiring harness. Make sure all connections are secure and properly seated.

5. Install the Battery Pack

Insert the battery pack into the battery backup unit, ensuring that it is securely seated and properly connected. Follow any specific instructions provided by the manufacturer regarding the installation and activation of the battery pack.

6. Test the Battery Backup

Once the installation is complete, test the battery backup to ensure that it functions properly. Unplug the garage door opener from the power source and attempt to operate the garage door using the wall-mounted control panel or remote transmitter. The garage door should open and close smoothly without any issues.

7. Perform Regular Maintenance

To ensure optimal performance of your battery backup system, perform regular maintenance checks according to the manufacturer’s recommendations. This may include testing the battery periodically, replacing the battery pack when necessary, and keeping the backup unit clean and free of debris.

8. Recharge the Battery

In the event of a power outage, the battery backup will automatically kick in to power the garage door opener. Once power is restored, recharge the battery pack according to the manufacturer’s instructions to ensure that it is ready for the next outage.

9. Consider Professional Installation

If you’re unsure about any aspect of the installation process or if you encounter difficulties along the way, consider hiring a professional garage door technician to install the battery backup for you. They have the knowledge and experience to ensure that the installation is done safely and correctly.

Conclusion:

Installing a battery backup on your Genie garage door opener is a straightforward process that provides added peace of mind knowing that you can still operate your garage door during power outages. By following the step-by-step instructions provided in this guide and referring to the manufacturer’s instructions, you can successfully install a battery backup system that ensures reliable operation of your garage door opener when you need it most.

Tarrant County Door & Gate

6408 Marlette Ct, Fort Worth, TX 76182, United States

1-817-456-2958

Can You Make A Copy Of A Garage Door Opener – Affordable Garage Door Repairs of Kokomo

Garage Door Repair Kokomo IN, commonly referred to as cloning or duplicating a remote, is a practical way to provide additional users with access to the garage door system. This process involves replicating the code or signal transmitted by the original remote onto a new remote device.

While cloning a garage door opener may seem straightforward, there are several important steps and considerations to ensure compatibility, security, and proper functionality. Let’s explore the process of making a copy of a garage door opener in detail:

1. Understanding Garage Door Opener Remotes: Garage door opener remotes are handheld devices used to transmit signals to the opener mechanism, triggering the door to open or close. These remotes typically utilize radio frequency (RF) signals or digital codes to communicate with the opener system. Cloning a garage door opener involves copying the unique code or signal from the original remote onto a new remote device.

2. Identifying the Original Remote: The first step in making a copy of a garage door opener is to identify the original remote that you wish to clone. This remote serves as the source from which the code or signal will be copied onto the new remote.

3. Ensuring Compatibility: Before proceeding with the cloning process, it’s essential to ensure that the original remote and the new remote are compatible with each other and with the garage door opener system. Check the manufacturer’s specifications and compatibility guidelines to verify that the new remote is compatible with the existing opener.

4. Acquiring a Cloning Device: To clone a garage door opener remote, you’ll need access to a cloning device or duplicator. These devices are specifically designed to copy the code or signal from the original remote onto the new remote. Cloning devices are available for purchase online, at hardware stores, or through garage door service providers.

5. Preparing the Cloning Device: Once you have obtained a cloning device, follow the manufacturer’s instructions to set it up and prepare it for use. This may involve inserting batteries, selecting the appropriate cloning mode, and ensuring that the device is in proper working condition.

6. Initiating the Cloning Process: With the cloning device prepared, place the original remote and the new remote in close proximity to each other. Follow the cloning device’s instructions to initiate the cloning process. This typically involves pressing specific buttons or following prompts displayed on the device’s screen.

7. Verifying Successful Cloning: After completing the cloning process, verify that the new remote has successfully copied the code or signal from the original remote. Test the new remote by pressing its buttons and observing whether it successfully operates the garage door opener. Ensure that the cloned remote functions reliably and consistently.

8. Programming Additional Features (if applicable): Some garage door opener remotes may include additional features or buttons for controlling other functions, such as lighting or security locks. If the original remote has such features, ensure that they are properly programmed onto the new remote during the cloning process.

9. Safeguarding Security: While cloning a garage door opener provides convenient access to multiple users, it’s important to prioritize security. Keep the original remote secure and avoid sharing it with unauthorized individuals. Additionally, consider enabling security features such as rolling code technology, which generates a new code each time the remote is used, enhancing protection against unauthorized cloning.

10. Consulting Professional Assistance (if necessary): If you encounter challenges or are unsure about the cloning process, consider seeking assistance from a professional garage door technician. They can provide guidance, ensure compatibility, and perform the cloning process accurately to avoid any issues or complications.

Conclusion:
Garage Door Repair Kokomo IN involves cloning the code or signal from the original remote onto a new remote device. By following the outlined steps and considerations, you can successfully clone a garage door opener and provide convenient access to multiple users while prioritizing security and functionality. With a properly cloned remote, users can enjoy seamless operation of the garage door opener system, enhancing convenience and peace of mind.

Affordable Garage Door Repairs of Kokomo

1206 Peace Pipe Dr, Kokomo, IN 46902, United States

1-765-441-4637

How To Add More Lights To Garage Door Opener – Martin Garage Door

Adding more lights to a Garage Door Repair Parker CO can enhance visibility, safety, and convenience in your garage space.

Garage door openers typically come equipped with one or two built-in lights, but you may find it beneficial to add additional lighting for improved illumination. Whether you’re looking to brighten up your workspace, increase security, or simply enhance the aesthetics of your garage, adding more lights to your garage door opener is a relatively straightforward process. Let’s explore how you can add more lights to your garage door opener in detail:

1. Assessing Your Lighting Needs: Before adding more lights to your garage door opener, assess your lighting needs and objectives. Consider factors such as the size of your garage, the current level of illumination, specific areas that require additional lighting, and any activities you regularly perform in the garage.

2. Choosing the Right Lighting Fixtures: Select lighting fixtures that are suitable for garage use and compatible with your garage door opener. LED lights are often preferred for their energy efficiency, long lifespan, and bright illumination. You can choose from various options, including overhead lights, strip lights, motion-activated lights, or task lighting, depending on your preferences and requirements.

3. Power Source and Wiring: Determine the power source for your additional lights and plan the wiring accordingly. You may choose to connect the lights directly to the garage door opener’s electrical system or use a separate power source, such as an outlet or junction box. Ensure that the wiring meets local building codes and safety standards to prevent electrical hazards.

4. Installation Location: Decide where you want to install the additional lights in your garage. Common locations include the ceiling, walls, or specific areas where focused illumination is needed, such as workbenches or storage areas. Position the lights strategically to ensure uniform coverage and minimize shadows.

5. Mounting the Lights: Install the selected lighting fixtures securely according to the manufacturer’s instructions. If mounting overhead lights, ensure they are securely attached to the ceiling joists or support beams. Use appropriate mounting hardware and brackets to ensure stability and durability.

6. Wiring the Lights: If connecting the lights to the garage door opener’s electrical system, follow the manufacturer’s guidelines for wiring and connections. Turn off the power to the garage door opener and use insulated wires to make the necessary connections. If using a separate power source, install a switch or outlet for convenient control of the lights.

7. Testing and Adjustments: Once the lights are installed and wired, test them to ensure they function correctly. Turn on the power and check for proper illumination and functionality. Make any necessary adjustments to the positioning or angle of the lights to optimize the lighting coverage and brightness.

8. Integration with Garage Door Opener: If desired, integrate the additional lights with your garage door opener for seamless operation. Some garage door openers come with built-in light control features, allowing you to turn the lights on or off using the opener’s remote control or wall-mounted button. Follow the manufacturer’s instructions for programming and synchronization.

9. Adding Smart Lighting Features (Optional): For added convenience and control, consider adding smart lighting features to your garage. You can install smart light bulbs or smart switches that can be controlled remotely via smartphone apps or voice commands. This allows you to adjust the lighting settings and schedule automatic on/off times according to your preferences.

10. Safety Precautions: Ensure that all electrical connections are properly insulated and protected to prevent shocks or fire hazards. Use caution when working with electricity and follow safety guidelines at all times. If you’re not comfortable with electrical wiring, consider hiring a qualified electrician to assist with the installation.

Conclusion: Adding more lights to your Garage Door Repair Parker CO can significantly improve the lighting quality and functionality of your garage space. By carefully assessing your lighting needs, selecting appropriate fixtures, planning the wiring, and following proper installation procedures, you can enhance visibility, safety, and convenience in your garage. Whether you’re installing overhead lights, strip lights, or motion-activated fixtures, integrating additional lighting with your garage door opener can transform your garage into a well-lit and functional workspace. Remember to prioritize safety and compliance with local building codes throughout the installation process to ensure a safe and successful outcome. With the right approach, you can enjoy improved illumination and enhanced usability in your garage for years to come.

Martin Garage Door

10411 S Parker Rd, Parker, CO 80134

1-303-663-1310

How Much To Install Electric Garage Door Opener – Tarrant County Door & Gate

If you’re considering upgrading your Garage Door Repair North Richland Hills TX, you’re likely wondering about the associated costs.

Installing an electric garage door opener can enhance convenience, security, and overall functionality. In this comprehensive guide, we’ll explore various factors that influence the cost of installation and provide valuable insights to help you budget effectively.

Understanding Electric Garage Door Openers

Before diving into costs, let’s understand what electric garage door openers entail:

An electric garage door opener is a motorized device that automates the opening and closing of your garage door. These openers come in various types, including chain-drive, belt-drive, screw-drive, and direct-drive, each offering different levels of noise, speed, and durability.

Factors Affecting Installation Costs

Several factors influence the cost of installing an electric garage door opener:

  • Opener Type: The type of opener you choose will significantly impact the cost. Chain-drive openers are typically the most affordable but may produce more noise. Belt-drive openers offer quieter operation but may cost more upfront. Screw-drive and direct-drive openers provide smooth and quiet operation but may come at a higher price.
  • Opener Features: Advanced features such as Wi-Fi connectivity, battery backup, and smart home integration can add to the overall cost. While these features enhance convenience and security, they may increase the upfront investment.
  • Compatibility: Ensure that the opener you select is compatible with your existing garage door and hardware. Incompatible components may require additional modifications or replacements, increasing installation costs.
  • Labor Rates: Installation costs vary depending on the contractor’s rates, location, and level of expertise. Hiring a professional ensures proper installation and warranty coverage, but it may come at a higher cost than a DIY approach.

Average Cost of Electric Garage Door Opener Installation

The cost of installing an electric garage door opener varies depending on factors such as opener type, features, compatibility, and labor rates. On average, homeowners can expect to pay:

  • Basic Installation: For a standard single electric garage door opener with basic features and no additional customization, the cost typically ranges from $200 to $500.
  • Advanced Installation: For a high-end electric garage door opener with premium features such as Wi-Fi connectivity, battery backup, and smart home integration, the cost can range from $500 to $1,000 or more.

DIY vs. Professional Installation

While some homeowners may consider a DIY installation to save money, it’s essential to weigh the pros and cons:

  • DIY Installation: DIY installation can save on labor costs, but it requires technical skills, specialized tools, and knowledge of electrical wiring and safety regulations. Improper installation can compromise security and functionality.
  • Professional Installation: Hiring a professional ensures proper installation, warranty coverage, and peace of mind. While it adds to the overall cost, professional installation reduces the risk of issues down the line.

Tips for Cost-Saving

To minimize the cost of electric garage door opener installation, consider the following tips:

  • Choose a Standard Model: Opt for a standard electric garage door opener with basic features to keep costs down. While advanced features may enhance convenience, they also increase the overall cost.
  • Reuse Existing Hardware: If your existing garage door opener hardware is in good condition, you may be able to save on installation costs by reusing it with the new opener. However, ensure compatibility to avoid compatibility issues.
  • Shop Around: Obtain quotes from multiple contractors to compare prices and services offered. By shopping around, you can ensure you get the best value for your money.

Conclusion:

Garage Door Repair North Richland Hills TX can significantly improve the functionality and convenience of your garage. By understanding the factors influencing installation costs and following the tips outlined in this guide, you can ensure a smooth and cost-effective installation process.

Tarrant County Door & Gate

6408 Marlette Ct, Fort Worth, TX 76182, United States

1-817-456-2958

Can You Change The Frequency Of A Garage Door Opener – First Call Garage Doors


Yes, it is possible to change the frequency of a Garage Door Repair Richmond TX although the process may vary depending on the model and type of opener you have.

Here’s a comprehensive guide on how to change the frequency of a garage door opener:

1. Determine Compatibility:

  • Before attempting to change the frequency of your garage door opener, check the owner’s manual or manufacturer’s documentation to confirm if the opener supports frequency adjustment. Not all models may have this feature, especially older or basic models.

2. Locate the Frequency Setting:

  • Most modern garage door openers have a control panel or settings menu where you can adjust various parameters, including the frequency. This control panel is typically located on the main unit of the garage door opener, often near the motor or on the backside of the unit.

3. Access the Control Panel:

  • Depending on your garage door opener model, you may need to remove the cover or access panel to reach the control panel. Use a screwdriver or appropriate tools to remove any screws or fasteners securing the cover in place, then carefully lift or slide off the cover to reveal the control panel.

4. Enter Programming Mode:

  • Once you have accessed the control panel, follow the instructions in the owner’s manual to enter programming mode. This usually involves pressing a combination of buttons or holding down a specific button for a set period. Refer to the manufacturer’s instructions for the correct sequence.

5. Select New Frequency:

  • Once in programming mode, use the control panel or keypad to navigate to the frequency adjustment option. This may be labeled as “Frequency,” “Code,” or something similar. Use the arrow keys or buttons to select a new frequency from the available options.

6. Save Changes:

  • After selecting the new frequency, follow the prompts on the control panel to save your changes. This may involve pressing a designated button or combination of buttons to confirm the selection and exit programming mode. Wait for the garage door opener to acknowledge the new frequency.

7. Test the Garage Door Opener:

  • After changing the frequency, test the garage door opener to ensure that it operates correctly with the new settings. Use the remote control or wall-mounted keypad to open and close the garage door several times, checking for any issues or malfunctions.

8. Reconnect Power Source:

  • Once you have confirmed that the garage door opener is functioning properly with the new frequency, replace the cover or access panel and secure it in place with screws or fasteners. Reconnect the power source to the garage door opener to restore normal operation.

9. Final Adjustments:

  • If necessary, fine-tune the sensitivity and other settings of the garage door opener to optimize performance with the new frequency. Refer to the owner’s manual for instructions on adjusting these parameters.

Garage Door Repair Richmond TX If you encounter any difficulties or uncertainties during the process, consult the owner’s manual or contact the manufacturer for assistance.

First Call Garage Doors

20527 FM 1093 Rd Unit B205 Richmond, TX 77407

713-248-2684

https://maps.app.goo.gl/t63qb9AmNfom8KU87

How To Program Universal Garage Door Remote – Southern Home Creations Garage Doors & Openers


Programming a universal Garage Door Repair Suwanee GA allows you to operate multiple garage door openers from different manufacturers with a single device.

Here’s a detailed guide on how to program a universal garage door remote:

1. Identify Your Garage Door Opener Model:

  • Before you begin, determine the make and model of your garage door opener. This information will help you find the correct programming instructions for your specific opener.

2. Choose a Compatible Universal Remote:

  • Select a universal garage door remote that is compatible with your garage door opener model. Ensure that the remote supports the frequency and technology used by your opener (e.g., 315MHz, 390MHz, rolling code, dip switch, etc.).

3. Prepare the Remote:

  • Remove the battery cover from the universal remote and insert the appropriate batteries according to the manufacturer’s instructions. Replace the battery cover securely.

4. Locate the Learn Button on the Opener:

  • Find the “Learn” or “Program” button on your garage door opener unit. This button is usually located on the back or side of the opener motor housing.

5. Put the Opener into Programming Mode:

  • Press and release the “Learn” button on the garage door opener. The indicator light on the opener should illuminate or start blinking, indicating that it is in programming mode and ready to receive a new remote signal.

6. Program the Universal Remote:

  • Follow the specific programming instructions provided by the manufacturer of the universal remote. Typically, this involves pressing and holding a specific button or sequence of buttons on the remote while aiming it at the opener unit.

7. Test the Remote:

  • Once programmed, test the universal remote by pressing the button(s) corresponding to the desired garage door function (e.g., open, close, stop). The garage door should respond accordingly by moving in the desired direction.

8. Program Additional Buttons (Optional):

  • If your universal remote has multiple buttons for controlling different garage doors or functions, repeat the programming process for each button following the same steps outlined above.

9. Finalize Programming:

  • After programming all desired buttons, press the “Learn” button on the opener unit again to exit programming mode. The indicator light on the opener should stop blinking, indicating that the programming process is complete.

10. Mount the Remote (Optional):

  • If desired, attach the universal remote to your vehicle’s visor or another convenient location using the provided mounting hardware or adhesive strips.

11. Troubleshooting:

  • If the remote does not work as expected, double-check the programming instructions and ensure that you followed each step correctly. You may need to repeat the programming process or consult the universal remote’s instruction manual for troubleshooting tips.

Conclusion:

  • Garage Door Repair Suwanee GA By following these steps and referring to the specific instructions provided with your universal remote, you can quickly and easily program it to work with your garage door opener.

Southern Home Creations Garage Doors & Openers

4110 Tench Rd Suite D, Suwanee, GA 30024, United States

1-770-831-0301

https://maps.app.goo.gl/1sSeEcj3whKsA8wN7

How To Program Second Chamberlain Garage Door Opener – Southern Home Creations Garage Doors & Openers

Programming a second Chamberlain Garage Door Repair Suwanee GA involves a series of steps to synchronize the opener with your garage door and remote control devices.

Here’s a detailed guide on how to program a second Chamberlain garage door opener:

1. Locate the Learn Button:

  • Before programming your second Chamberlain garage door opener, locate the “Learn” button on the opener motor unit. This button is typically located on the back or side of the motor unit and may be labeled as “Learn” or “Program.”

2. Clear Existing Codes (Optional):

  • If you’re reprogramming the garage door opener or adding a new remote control, it’s recommended to clear existing codes from the opener memory. Press and hold the “Learn” button on the motor unit until the indicator light turns off, indicating that existing codes have been erased.

3. Program Remote Controls:

  • To program a remote control device to the Chamberlain garage door opener, follow these steps:
    • Press and release the “Learn” button on the motor unit. The indicator light will illuminate, indicating that the opener is in programming mode.
    • Within 30 seconds, press and hold the button on the remote control that you wish to program. Hold the button until the indicator light on the motor unit flashes, indicating that the remote control has been successfully programmed.
    • Repeat this process for each additional remote control device you wish to program to the garage door opener.

4. Program Keyless Entry Keypad (If Applicable):

  • If your Chamberlain garage door opener is equipped with a keyless entry keypad, you can program it using similar steps:
    • Press and release the “Learn” button on the motor unit.
    • Within 30 seconds, enter your desired PIN code on the keypad and press the “Enter” or “Learn” button. The indicator light on the motor unit should flash, indicating that the keypad has been successfully programmed.

5. Test the Remote Controls and Keypad:

  • After programming remote controls and keypads, test their functionality to ensure they operate the garage door opener correctly. Stand inside your garage and press the programmed buttons on the remote controls or enter the PIN code on the keypad to open and close the garage door.

6. Adjust Travel Limits and Force Settings (If Necessary):

  • After programming the remote controls and keypad, it’s a good idea to test the garage door’s travel limits and force settings to ensure smooth and safe operation. Refer to the opener’s user manual for instructions on adjusting travel limits and force settings as needed.

7. Finalize Programming:

  • Once you’ve programmed all remote controls and keypad devices and verified their functionality, press the “Learn” button on the motor unit to exit programming mode. The indicator light should turn off, indicating that the programming process is complete.

8. Troubleshooting:

  • If you encounter any issues during the programming process, such as the indicator light not flashing or remote controls not working, double-check the programming steps and ensure that you’re within range of the opener. If problems persist, refer to the opener’s user manual for troubleshooting tips or contact customer support for assistance.

Conclusion:

  • By following the steps outlined above and referring to the opener’s user manual for guidance, you can program your second Chamberlain Garage Door Repair Suwanee GA with ease and enjoy convenient access to your garage.

Southern Home Creations Garage Doors & Openers

4110 Tench Rd Suite D, Suwanee, GA 30024, United States

1-770-831-0301

https://maps.app.goo.gl/1sSeEcj3whKsA8wN7

How To Open A Manual Garage Door From The Outside – Bridgeport Best Garage & Overhead Doors


Opening a manual Garage Door Repair Bridgeton TX from the outside is a straightforward process but requires caution and proper technique to avoid damage or injury.

Here’s a detailed guide on how to open a manual garage door from the outside:

1. Approach the Garage Door:

  • Stand in front of the closed garage door and locate the handle or lifting mechanism on the bottom panel of the door. The handle is typically a T-shaped handle or a rope attached to the bottom panel.

2. Grasp the Handle or Rope:

  • If your garage door has a handle, grasp it firmly with one hand. If it has a rope, pull down on the rope to release the latch mechanism. Ensure your grip is secure to prevent slipping.

3. Lift the Door:

  • With a firm grip on the handle or rope, lift the bottom panel of the garage door upward. Use your legs and back to lift, rather than relying solely on your arms, to avoid strain or injury.

4. Monitor the Door’s Movement:

  • As you lift the door, be mindful of its weight and movement. Manual garage doors can be heavy, especially if they are not properly balanced. Lift the door steadily and smoothly to avoid jerky movements.

5. Secure the Door in the Open Position:

  • Once the garage door is open to the desired height, secure it in place by propping it open with a sturdy object such as a block of wood or a brick. Place the object underneath the door to prevent it from closing unexpectedly.

6. Enter the Garage:

  • With the garage door open, you can now enter the garage safely. Be cautious when walking underneath the open door, especially if it is partially obstructed by vehicles or other objects.

7. Close the Garage Door:

  • To close the garage door from the outside, simply reverse the process. Remove the prop holding the door open and lower the door slowly and carefully. Use your legs to support the weight of the door as you lower it to avoid strain on your back or arms.

8. Secure the Door:

  • Once the door is fully closed, ensure it is securely latched to prevent unauthorized entry. Check that the latch mechanism engages fully and that the door is flush with the ground to maintain security and weatherproofing.

9. Perform Routine Maintenance:

  • Regularly inspect and maintain your manual garage door to ensure smooth operation and longevity. Lubricate moving parts, tighten hardware, and address any signs of wear or damage promptly to prevent issues and prolong the life of your garage door.

10. Consider Upgrading to Automatic Operation:

  • If manually opening and closing your garage door becomes inconvenient or cumbersome, consider upgrading to an automatic garage door opener. Automatic openers provide convenience, security, and additional features such as remote operation and smart home integration.

Conclusion:

  • Garage Door Repair Bridgeton TX  By following these steps and maintaining your garage door regularly, you can enjoy reliable performance and convenience for years to come.

Bridgeport Best Garage & Overhead Doors

701 E Cates St, Bridgeport, TX 76426, United States

1-940-532-8593

https://maps.app.goo.gl/YBR9xXjnZMPhUNvy9

Page 3 of 41

Powered by WordPress & Theme by Anders Norén