
As a homeowner, ensuring the safety and well-being of your family is paramount. One significant concern that often lurks unseen is mold. Mold not only damages the structure of your home but also poses serious health risks. Testing for mold is essential for early detection and mitigation.
In this comprehensive guide from Mold Testing Houston TX, I’ll walk you through the steps to effectively test for mold in your home, empowering you to safeguard your loved ones and your property.
Understanding Mold:
Before delving into testing methods, it’s crucial to understand what mold is and where it thrives. Mold is a type of fungus that can grow indoors and outdoors, thriving in moist and warm environments. In homes, common areas for mold growth include bathrooms, kitchens, basements, and areas with poor ventilation.
Signs of Mold Infestation:
Identifying the presence of mold in your home is the first step in addressing the issue. Look out for these common signs:
- Visible Mold Growth: Keep an eye out for patches of mold on walls, ceilings, floors, and other surfaces. Mold often appears as fuzzy, discolored spots.
- Musty Odor: Mold emits a distinctive musty smell. If you notice an unpleasant, lingering odor in certain areas of your home, it could indicate mold growth.
- Water Damage: Areas that have experienced water damage, such as leaks or flooding, are highly susceptible to mold growth. Inspect these areas closely.
- Allergic Reactions: Persistent allergic symptoms like sneezing, coughing, or nasal congestion could be a sign of mold exposure, especially if they worsen when you’re at home.
DIY Mold Testing Methods:
While professional mold inspection services are available, you can also conduct preliminary testing on your own using DIY kits. Here’s how:
- Purchase a Mold Testing Kit: Visit your local hardware store or purchase a mold testing kit online. These kits typically include swabs, petri dishes, and instructions for collecting samples.
- Select Sampling Locations: Identify areas in your home where mold growth is suspected or where there’s a musty odor. These could include bathrooms, basements, attics, and areas with past water damage.
- Follow Instructions Carefully: Each mold testing kit comes with specific instructions for collecting samples. Follow these instructions meticulously to ensure accurate results.
- Collect Samples: Using the swabs or petri dishes provided in the kit, carefully collect samples from the selected locations. Make sure to seal the samples properly to prevent contamination.
- Wait for Results: Depending on the type of kit you’ve purchased, you may need to send the samples to a laboratory for analysis or wait for visible mold growth in the petri dishes. Results typically take a few days to a week.
Professional Mold Inspection:
For a more comprehensive assessment of mold in your home, consider hiring a professional mold inspector. Here’s what to expect from the process:
- Initial Assessment: The inspector will conduct a thorough visual inspection of your home, identifying areas of concern and potential sources of mold growth.
- Air Sampling: Air samples may be taken to measure the concentration of mold spores in the indoor air. This helps determine the extent of the mold problem and identify the types of mold present.
- Surface Sampling: Samples may be collected from surfaces suspected of mold growth, such as walls, floors, or ceilings. These samples are analyzed to confirm the presence of mold and identify the species.
- Moisture Detection: Since mold thrives in damp environments, the inspector will also assess moisture levels in your home using specialized tools like moisture meters and thermal imaging cameras.
- Report and Recommendations: Once the inspection is complete, the inspector will provide you with a detailed report of their findings, including recommendations for remediation if mold is detected.
Mold Remediation:
If mold is found in your home, prompt remediation is crucial to prevent further damage and protect your health. Depending on the extent of the infestation, remediation may involve:
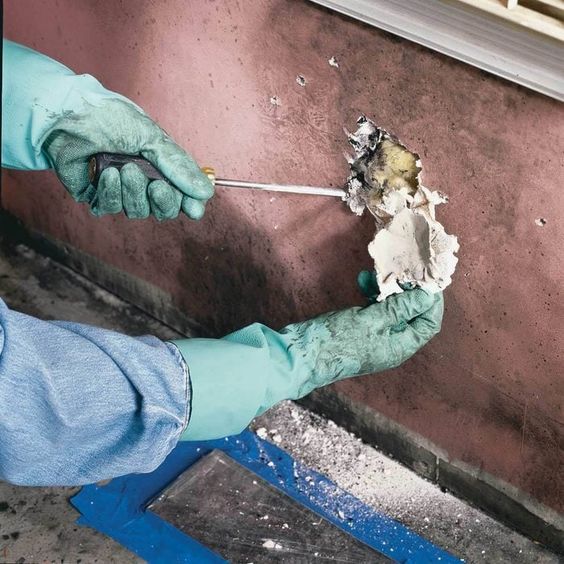
- Mold Removal: Removing mold-infested materials such as drywall, insulation, or carpeting. This should be done carefully to prevent the spread of mold spores.
- Cleaning and Disinfection: Cleaning surfaces with mold-killing solutions and disinfectants to eliminate remaining mold spores.
- Repairing Water Damage: Addressing underlying issues such as leaks or poor ventilation to prevent future mold growth.
- Improving Ventilation: Enhancing ventilation in your home to reduce moisture levels and create an inhospitable environment for mold growth.
Preventive Measures:
Once mold remediation is complete, take proactive steps to prevent mold from returning:
- Monitor Humidity Levels: Keep indoor humidity levels below 60% to discourage mold growth. Use dehumidifiers if necessary, especially in damp areas like basements and bathrooms.
- Fix Leaks Promptly: Repair any leaks in your plumbing, roof, or windows immediately to prevent water damage and mold growth.
- Ventilate Your Home: Ensure proper ventilation in kitchens, bathrooms, and other moisture-prone areas to allow excess moisture to escape.
- Regular Maintenance: Regularly inspect your home for signs of mold, water damage, and moisture buildup. Address any issues promptly to prevent mold from taking hold.
Conclusion:
Overall, based from Mold Testing Houston TX, testing for mold in your home is a crucial step in maintaining a safe and healthy living environment for you and your family. Whether you opt for DIY testing kits or professional inspection services, early detection is key to mitigating mold-related risks. By understanding the signs of mold infestation, conducting thorough testing, and taking preventive measures, you can effectively combat mold and safeguard your home for years to come.
Mold Testing Houston
5926 Dellfern Dr, Houston, TX 77035, United States
832-409-2125