Local Businesses Blog in Texas

Cleveland Texas

Tag: garage door repair Argyle TX

How To Manually Close Electric Garage Door – Argyle Gates & Garage Doors

Electric Garage Door Repair Argyle TX offer convenience and security to homeowners, allowing them to open and close the door with the push of a button.

However, there may be situations when you need to close the garage door manually, such as a power outage or a malfunctioning opener. In this comprehensive guide, we will walk you through the process of manually closing an electric garage door step by step, ensuring your safety and the proper operation of your door.

1. Ensure Safety

Before you start, it’s crucial to prioritize safety. Here are some precautions to take:

  • Disconnect the power: To prevent any accidental activation of the electric opener, unplug it from the power source or turn off the circuit breaker that supplies power to the garage door opener.
  • Clear the area: Make sure there are no obstructions in the path of the garage door. Ensure that people, pets, and objects are safely away from the closing door.
  • Use caution: Manually closing a garage door can be physically demanding, especially if it’s a heavy door. If you’re unsure about your ability to do it safely, consider asking for assistance.

2. Locate the Emergency Release Cord

Most garage door openers come with an emergency release cord. This cord is typically red and hangs from the opener’s trolley. Its purpose is to disconnect the opener from the door so that you can manually operate the door.

3. Pull the Emergency Release Cord

Gently pull down on the emergency release cord. This action will disengage the opener from the garage door, allowing you to operate the door manually. You will feel some resistance as you pull the cord.

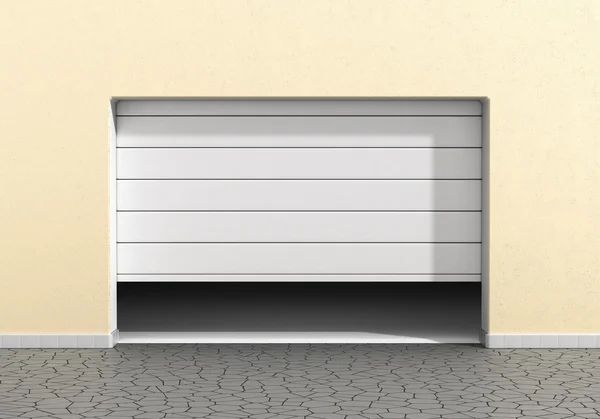
4. Lift the Garage Door

With the emergency release cord disengaged, you can now lift the garage door manually. Place your hands on the bottom of the door on both sides and lift it slowly and steadily. Depending on the type and weight of your garage door, you may need assistance.

5. Close the Garage Door Carefully

As you lower the garage door, ensure that it descends evenly and smoothly. Do not let go of the door abruptly, as this could cause damage or pose a safety risk. Keep a firm grip on the door until it is fully closed.

6. Re-engage the Garage Door Opener

Once the door is closed, you will need to re-engage the garage door opener to its normal operating mode. To do this:

  • Pull the emergency release cord down again to its original position.
  • The trolley on the opener should re-engage with the door. You may need to push the door slightly to help the trolley connect.

7. Test the Door

After re-engaging the opener, it’s essential to test the door’s operation. Use the garage door opener remote or wall button to open and close the door. Make sure it operates smoothly and without any issues.

8. Reconnect the Power

If the power was disconnected earlier, plug the garage door opener back into the power source or turn the circuit breaker back on.

9. Schedule Repairs

Manually closing your garage door should be a temporary solution. If you needed to do this due to a malfunctioning opener or any other issue, it’s crucial to schedule repairs with a qualified technician. Operating your garage door manually for an extended period can cause additional damage.

Conclusion:

Knowing how to manually close an electric Garage Door Repair Argyle TX is a valuable skill for any homeowner. By following the steps outlined in this guide and prioritizing safety, you can ensure that your garage door can be operated even in situations where the electric opener is not functional. Remember that manual operation should be a temporary measure, and any issues with your garage door opener should be addressed by a professional technician promptly.

Argyle Gates & Garage Doors

940-400-3769

How Install Garage Door-Argle TX Garage Door Repair

Installing a Garage Door Repair Argyle TX requires careful attention to detail and following the manufacturer’s instructions.

Here is a step-by-step guide to help you install a garage door. Please note that this guide provides a general overview, and it is important to consult the specific instructions provided by the manufacturer of your garage door for precise installation steps.

  1. Gather the necessary tools and materials:
    • Garage door kit (including the door panels, tracks, rollers, hinges, and springs)
    • Garage door opener (if applicable)
    • Power drill
    • Screwdriver
    • Measuring tape
    • Level
    • Stepladder
    • Safety glasses
    • Helper (optional but recommended)
  2. Measure and prepare the opening:
    • Measure the width and height of the garage door opening to ensure the door fits properly.
    • Clear the area around the opening, removing any obstructions or old garage door components.
  3. Install the vertical tracks:
    • Attach the vertical track to each side of the opening using the provided brackets and screws.
    • Ensure the tracks are plumb using a level.
  4. Install the horizontal tracks:
    • Attach the horizontal track sections to the ceiling using the provided brackets and screws.
    • Make sure the tracks are aligned and level with the vertical tracks.
  5. Install the door panels:
    • Start with the bottom panel and insert it into the vertical tracks.
    • Place the rollers into the panel’s hinges and secure them with screws.
    • Repeat this process for each panel, connecting them together using hinges.
  6. Install the springs and cables:
    • Follow the manufacturer’s instructions to install the torsion springs above the door opening.
    • Attach the lift cables to the bottom brackets and run them through the pulleys.
    • Connect the cables to the springs using the provided hardware.
  7. Install the opener (if applicable):
    • Follow the manufacturer’s instructions to install the garage door opener.
    • Mount the opener to the ceiling and connect it to the door with the provided attachment bracket.
    • Install the safety sensors according to the manufacturer’s guidelines.
  8. Test the door’s operation:
    • Manually open and close the door several times to ensure smooth operation.
    • Adjust the spring tension if needed to achieve proper balance.
    • Test the automatic opening and closing using the garage door opener.
  9. Make final adjustments and secure the hardware:
    • Check the alignment of the tracks and adjust if necessary.
    • Tighten all the screws and bolts, ensuring everything is secure.
    • Install any additional hardware provided by the manufacturer, such as weatherstripping or decorative handles.
  10. Safety precautions:
  • Always wear safety glasses when working with tools and materials.
  • Be cautious of the heavy garage door during installation.
  • Follow all safety instructions provided by the manufacturer.

Remember, this is a general guide, and the specific steps may vary depending on the type and model of your Garage Door Repair Argyle TX. It’s crucial to consult the manufacturer’s instructions for precise installation guidelines. If you are unsure about any step or encounter difficulties, it is recommended to seek professional assistance for the installation of your garage door.

Argle TX Garage Door Repair

Argyle, Texas

940-400-3769

How to Sync Garage Door Opener – Argyle Garage Door Repair

Syncing a Garage Door Repair Argyle TX opener can be a relatively simple process if you follow the manufacturer’s instructions carefully.

Here are some general steps that you can follow to sync a Garage Door Repair Argyle TX opener:

  1. Prepare for the Syncing Process

Before starting the syncing process, make sure that your garage door opener is compatible with your remote control. You should also check the batteries in your remote control to ensure that they have sufficient power.

  1. Find the Learn Button

The first step in syncing your garage door opener is to locate the “Learn” button on the motor unit of your opener. The location of this button may vary depending on the model and manufacturer of your garage door opener. Check your owner’s manual for specific instructions on where to find this button.

  1. Press the Learn Button

Once you have located the Learn button, press and hold it down for a few seconds until the indicator light on the motor unit turns on. The light will usually flash or stay lit to indicate that the opener is ready to receive the signal from the remote control.

  1. Press the Remote Control Button

Next, press the button on your remote control that you want to use to open and close the garage door. Hold the button down until the garage door starts moving. The motor unit should make a clicking sound to confirm that it has received the signal from the remote control.

  1. Test the Remote Control

After syncing the garage door opener, test the remote control to ensure that it is working correctly. Press the button on the remote control to open and close the garage door several times to confirm that it is synced properly.

  1. Repeat the Process

If you have multiple remote controls that you want to sync with your garage door opener, repeat the syncing process for each remote control.

Tips for Syncing Your Garage Door Opener

Here are some tips that can help you sync your garage door opener more effectively:

  1. Check the Batteries: Before syncing your garage door opener, make sure that the batteries in your remote control are fully charged. Weak batteries can affect the range and reliability of your remote control.
  2. Keep the Remote Control Close: When syncing your garage door opener, make sure that the remote control is close to the motor unit. This will ensure that the signal is strong and that the opener receives the signal correctly.
  3. Clear the Memory: If you are having trouble syncing your garage door opener, try clearing the memory of the opener by holding down the Learn button for 30 seconds. This will erase all previously synced remote controls, and you can start the syncing process again from scratch.
  4. Check the Interference: Interference from other electronic devices can affect the signal between your remote control and the garage door opener. Try moving other electronic devices away from the opener to reduce interference.
  5. Use a Keypad: If you frequently forget your remote control, consider installing a keypad on the outside of your garage door. This will allow you to enter a code to open and close the garage door without using a remote control.

Conclusion:

Syncing a garage door opener is a relatively simple process that can be done in a few steps. Make sure that you follow the manufacturer’s instructions carefully and that you check the compatibility of your remote control with your garage door opener. By following these steps, you can ensure that your garage door opener works correctly and that you can open and close your garage door with ease.

Argyle Garage Door Repair

1004 Stonecrest Rd, Argyle, TX 76226, United States

1-940-326-5646

Powered by WordPress & Theme by Anders Norén