
Putting Back a Garage Door Opener
Garage door openers can be a very useful addition to your home. These instructions will help you to set it up.
A standard garage door opener uses a reversible motor to operate a train that runs over a rail. The rail is then placed on top of the door. An extension bar is attached to the motor that allows the door to be opened and closed. To stop the door from moving when it is closed or open, the door has a travel limiter device. Reversing switches or relays will reverse the direction of the motor’s movement from opening to closing and back again. Modern garage door openers include an audio receiver, which allows users to unlock their doors using the signal from an electronic module within a vehicle. Need the help of our Experts at Garage Door Repair West Palm Beach FL. Contact us today!
How to install a garage-door opener.
Step 1 :
You must place the mechanism in the middle of the door. A tape measure can be used to measure the length of your garage doors. The middle will measure half of the distance. Trace a vertical line along the middle of the door from the side. Attach your drawbar (the mechanism which raises or lowers doors) at this point so that the door is evenly distributed from the point it lifts.
Step 2:
Lower the door by lifting it up and focusing on the top of the door’s travel. This is important as the opener must be mounted at the top of the door’s movement. You may strike the rail if you don’t do this.
Step 3 :
You should inspect the area above the garage door. At the vertical dividing line, there must be support for fixing the front of the rail to the frame. Install a front mount board if your garage doesn’t have structural support. It should be placed in the middle. Secure the plank’s length using the lag screws attached to two wall studs at the highest point of door movement. Then, place your high-point marker on the plank and extend the vertical center line towards the plank.
Step 4 :
This rail should be connected to the garage floor motor unit according to the instructions. Lift the garage door and attach the end at the far end to the rear mounting plank. This should be approximately 2 inches above the intersection lines that you have drawn for the highest and centerlines of your doors. This rail bracket is typically attached to the front plank with the lag screws. You should drill holes in the front plank for nuts and bolts if they are included. To prevent bolt heads from getting through the wooden plank, make sure to use washers.
Step 5:
You should raise the motor assembly until it is parallel or vertical to the track. Once the motor assembly is in place, support it with your hands. Now move the garage door manually so that the rail doesn’t block the door’s movement. Once you’ve determined the correct height and position of the motor unit in the garage, attach it to the garage joists with the metal brackets included with the kit. Attach the motor assembly to the garage joists in the same direction that your rails. If this happens, attach the length 2×4 across the joints. Finally, fix the brackets for the 2×4. Once the garage ceiling is complete, you can attach lag screws to attach a 3/4-inch plywood board to the ceiling. Use strong toggle bolts to attach the hardware needed for mounting the plywood.
Step 6:
Then connect your drawbar to the rail carriage, and then move it into its closed position. Next, drill holes in the door. Once the drawbar has been fixed and the holes have been dug, it is time to insert and close the hardware that attaches the drawbar.
Step 7:
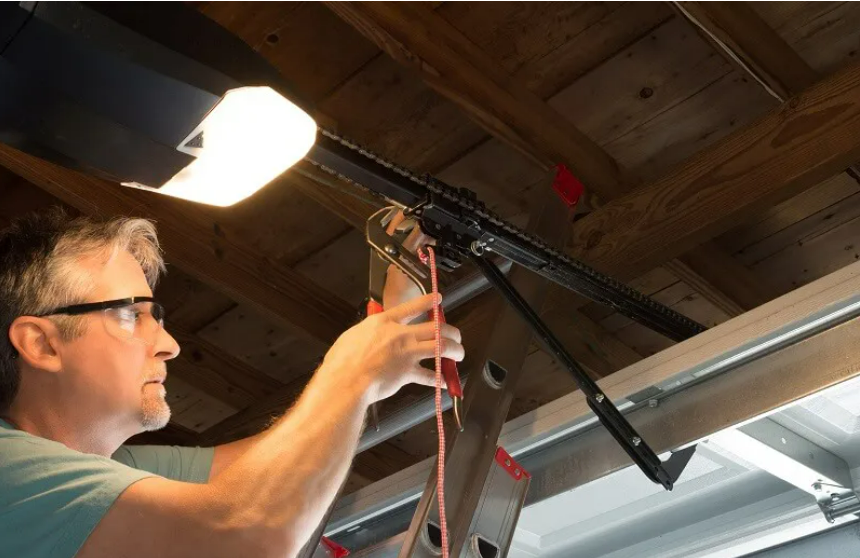
Make all necessary adjustments to the drive chain and the lead screw. Pay attention to the location of the bolts that limit the chain’s movement.
Step 8:
The radio receiver and the manual push button are both to be installed. You can use a regular bell wire to push this button. However, it is important to place it where you will see the garage door opener working every time you press the button. You can also install an additional key switch.
Step 9:
The extension cord should be connected to the drive. After that, plug it into the appropriate receptacle. Press the manual button to set the garage door in motion. Pull the extension cord several times when the garage door raises for the first time. This will ensure that there is no binding and that the door is moving in good order. You can make any adjustments necessary with the adjusters included in the garage opener’s system. After that, verify that the remote is operating properly.
Step 10:
The extension cord can be unplugged and then plugged into the permanent outlet. You can also connect the extension cable to the overhead light socket in your garage.
It doesn’t matter if the garage door is the opener or the door, you will now be able to repair the basic problems.